
Itty Bitty Light Conversion to LED
Why Replace the Bulb
The bulbs are made especially for the Itty Bitty Original Book Light. They burn hot, deposit the filament on the glass and dim. Eventually they get hot and burn out. Some only lasted for three weeks. Zelco, the company that makes the lights do not seem interested in fixing the problem as it has existed for years. (I cannot recommend this lamp!)
However I like the mount and it fits well on the headboard of my bed.
So it occurred to me that I might replace the bulb with an light emitting diode (LED). The LED uses little energy, last forever, and provide white light that does not dim over time. This solution will probably work even if you still power your Itty Bitty Light with the battery pack and will allow the batteries to last longer.
How to Replace the Bulb with an LED
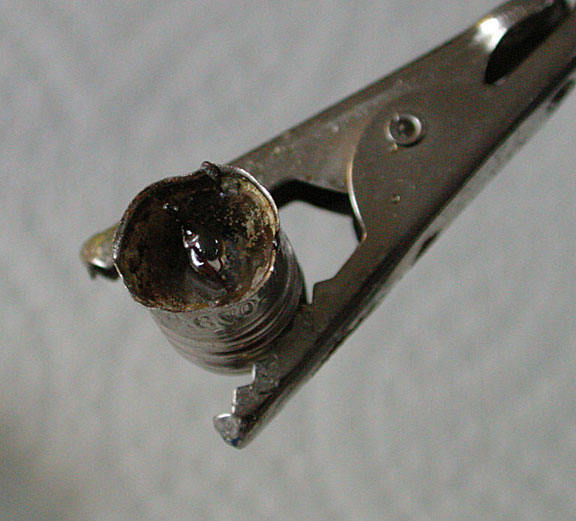
I took one of the old burnt out bulbs and broke the glass. This leaves two wires that support the filament standing up. The LED can be soldered to these wires. Since the light needs to exit sideways to the axis of the screw in base, I just placed the LED across the lamp base.
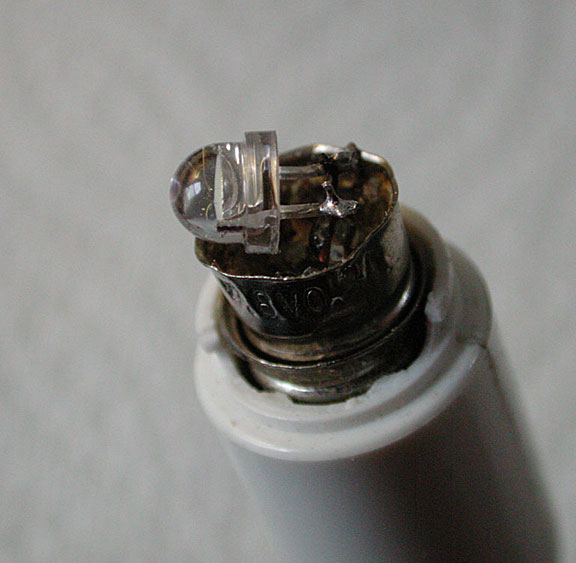
The soldering is a bit delicate but not impossible. Tin both the wire and the leads to the LED before soldering to minimize heat.
Screwing in the base it a problem because the LED might not be pointing in exactly the right direction, relative to the portion of the light that is clipped to the book or headboard. I was able to over tighten the lamp to get it pointing in the right direction. You might screw in the base before soldering the LED to the lamp base in order to insure the right position.
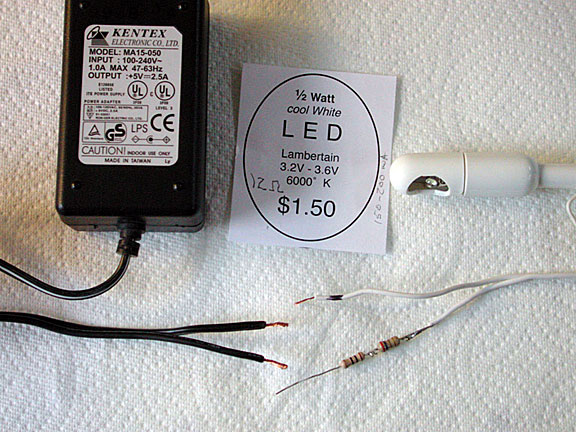
I replaced the battery pack long ago with an AC adaptor that produces five volts DC. The LED requires direct current and a current limiting resistor. That sounds technical but there are many websites that do the calculations for you. I have also provided the equation below. In my case, I was using a five volt power supply, the LED wanted to use 3.2 volts and used 150 milliamperes of current. The calculation results in a 12 ohm resistance, which I put two resistors in series in order to get an actual 13 ohms. You must be careful to connect the LED with the correct polarity. The flat side of the base of the LED is negative, as is the short lead.
Since I prefer to turn off the AC adaptor rather than just turn off the light, I have an inline switch that I used to turn everything off. Turning off the light using the little knob will not turn off the adaptor and it will continue to use some small amout of electricity.
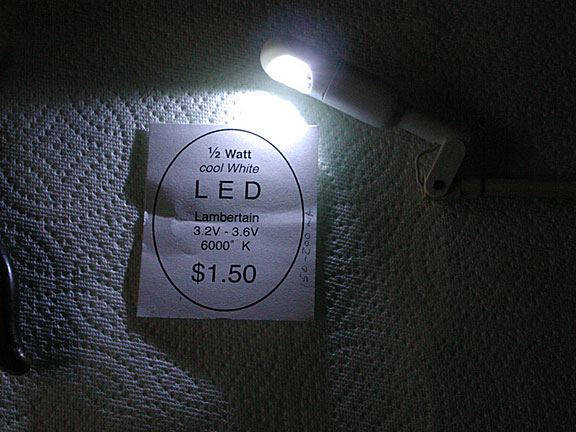
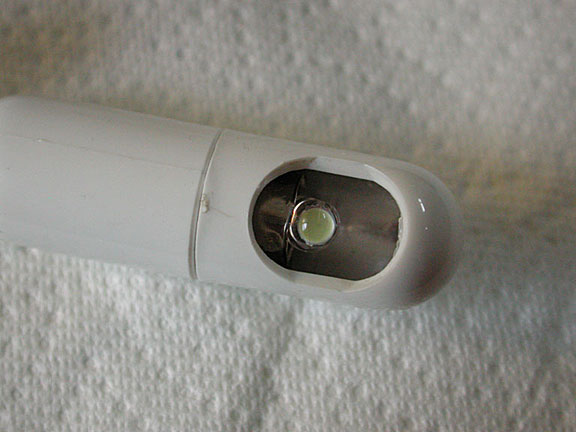
The resulting light is very bright, brighter than the original. It is also directional, so it does not bother my wife. It is possible to reduce the brightness by increasing the resistance, within a small range. Should you want to reduce the light dramatically, you will need to purchase a smaller LED. I replaced the light with a 1/2 watt LED, so you can go smaller if you prefer the dimmer light. You can also pick a warmer white as the 6000K white on my lamp is very white.
Equation for Calculating LED Resistance
There are some great websites that will do this calculation for you, provide a schematic and even show you how to determine the positive and negative leads to the LED. However if you cannot find one, here is the formula for calculating the resistance.
R = Vs - Vf / i
R is the resistance you need to limit the current through the LED.
Vs is the supply voltage from your AC adaptor, in my case five volts
Vf is the voltage the LED needs, as specified by the documentation. I picked 3.2 volts.
i is the current specified by your LED, 150 milliamperes.
My resistor was 12 ohms.