
Removing the Works
Instructions for removing the works:
- unplug the clock
- remove the back by prying at the sides. Never pry from the bottom as it pushes in the top against the discs.
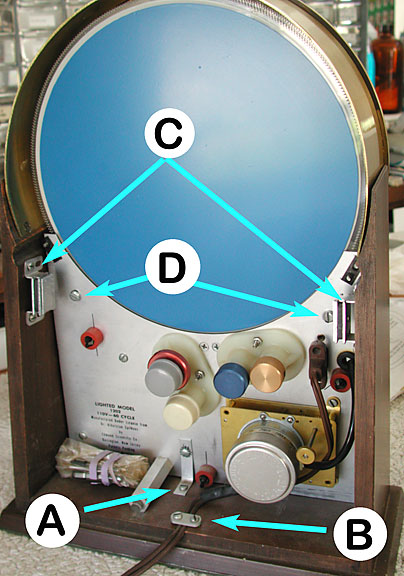
- remove the metal strap that holds the power cord to the bottom of the case (see B above)
- unscrew the wood L bracket from the bottom of the case (see A). It is not necessary to remove the L bracket from the works of the clock.
- remove the magnets that hold the back to the case on either side (see C)
- remove the two screws that hold the clock to an internal bracket (see D) Note these screws are different from the previously loosened wood screws and they generally have round heads.
- tilt the top of the clock out first as this raises the bottom of the two bottom dials out of a depression in the bottom of the case. (The depressions are behind the labels for A and B. It helps to hold the dial side of the clock up, and the back of the clock down, and let the works fall gently into your lap.) Sometimes there is a gray plastic guide at the top of the arch and it serves to keep the discs separated. This is sometimes, incorrectly, attached to the top of the arch. It will need to be pried off so the top of the discs can come out of the cabinet first. (See assembly instructions regarding the guide at the top of the arch.)
Note: To remove the works, it’s important to note it does not simply slide out to the rear because gears at the lower side extend into recesses in the wooden base. The plastic upper support block at the top that has the grooves to support the upper edges of the discs must be removed to the rear. The entire movement must be tilted backward so that the lower gears can be raised for the works to be removed.