
How to Change Your Coolant (first draft)
It is more difficult to change the coolant in a Lotus Elise because the engine is in the middle and the radiator is in the front. Coolant lines run through the frame rails from the back of the car to the front. Worse, the heater is in the passenger compartment and has its own coolant lines. The result is that there high and low points in the coolant path thus making it difficult to get much of the coolant out. Patience is required both when draining the coolant and when refilling it. Happily the coolant change interval is four years.
Please do not attempt this if you do not have the proper equipment and if you are not confident of your abilities I can accept no responsibility if you damage your car or hurt yourself. Working underneath a raised car is dangerous and care must be taken when lifting the car. Please review the oil change description regarding raising the car.
Basic Steps to Drain:
- raise the front of the car
- remove the front access panel
- remove the two hoses that connect to the radiator
- remove the header tank cap
- lower the front of the car
- raise the rear of the car
- remove the rear access panel
- drain the block
- blow air into the system (optional)
Basic Steps to Refill
- close the block drain
- reconnect the radiator hoses
- remove the right front wheel arch liner
- open the bleed plug, close when coolant shows
- open the heater bleed plug, close when coolant shows
- replace the access panel
- lower the car
- fill the coolant reservoir many times, making sure it always has fluid
- blow air into the reservoir to facilitate the refill process (optional)
- idle the car until the radiator fans turn on twice
- monitor the coolant level until it stabilizes
Tools and Materials
- replacement coolant, a bit more than two gallons
- Allen head wrench (remove access panel)
- 8mm hex head socket (remove access panel and hose clamps) (I think size is right, at front)
- 10mm hex head socket (remove access panel)
- 12mm hex head socket (remove access panel) (I think size is right, for two center support bolts at rear)
- wheel blocks (any wood pieces)
- automobile jack
- two jack stands (not essential but recommended)
- torque wrench (not essential but recommended)
- funnel
- drain pans, three is helpful
Coolant Flow Diagrams
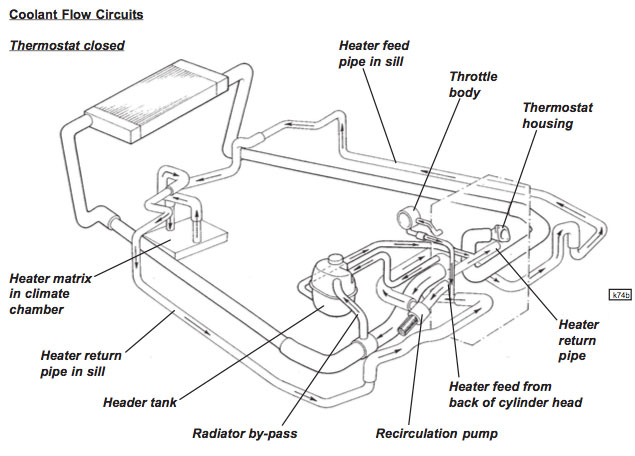
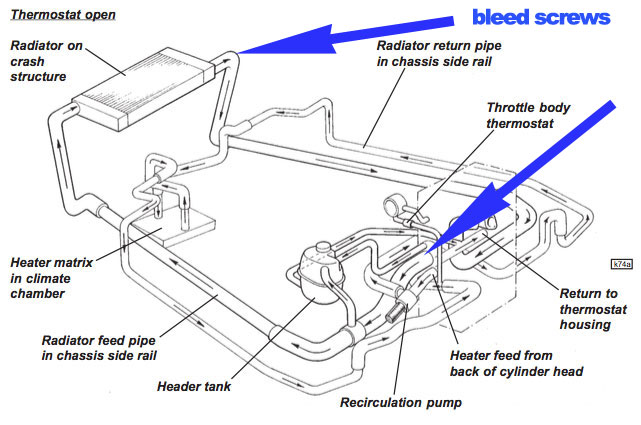
Notice how the coolant pipes and hoses go up and down. When draining, coolant will puddle in the low sections and not drain. When refilling, air bubbles will remain in the high sections and coolant will not completely fill the system. Your challenge will be to do all the things you can to complete the drain and refill process, first getting all the liquid out and then putting the liquid back in and getting all the bubbles out.
Please refer to the oil change reference page on how to lift the front and rear of the car safely.
Instructions from the Manual
Instructions from the manual on draining the coolant system, section KH 3.
To drain the engine cooling system:
- Remove the undertray from beneath the nose of the car.
- Disconnect the radiator feed and return hoses from the front ends of the through chassis pipes, and collect the draining coolant. Remove the header tank cap to speed the operation.
- Open the drain tap at the right hand rear of the cylinder block. Note that draining of the heater matrix is not easily possible with the unit 'in situ', and that if draining for the purpose of coolant change, this volume should be disregarded.
Draining the Coolant


Remove the panel. There are nine 10mm bolts around the front, the four bolts with black washers that attach the panel to the crash structure, and three small bolts that hold the back edge to the chassis. The panel will then slide towards the front until the back edge clears the chassis and then the panel will slide towards the rear and will release.
As an aside, you can see how stiff the Lotus 111 chassis is as the front is being held up on one side only and yet the chassis will not twist, allowing the wheel on the other side to touch the ground! I suppose the front sway bar is helping.
The left side radiator hose is above the sway bar mounting block. Unscrew the hose clamp and remove the hose from the tube. This was hard for me. I did not have the strength to pull the hose off the tube and the tube would move. I did not have the fancy rubber hose removal tool and I am not sure it would help because access is limited (see below). I removed the clamp and then ran the engine to heat the coolant, which caused the rubber to be more flexible and to expand. Caution! Do not allow the coolant to get too hot as the pressure will build and the hot water will spray out and potentially cause burns as you remove the hose.
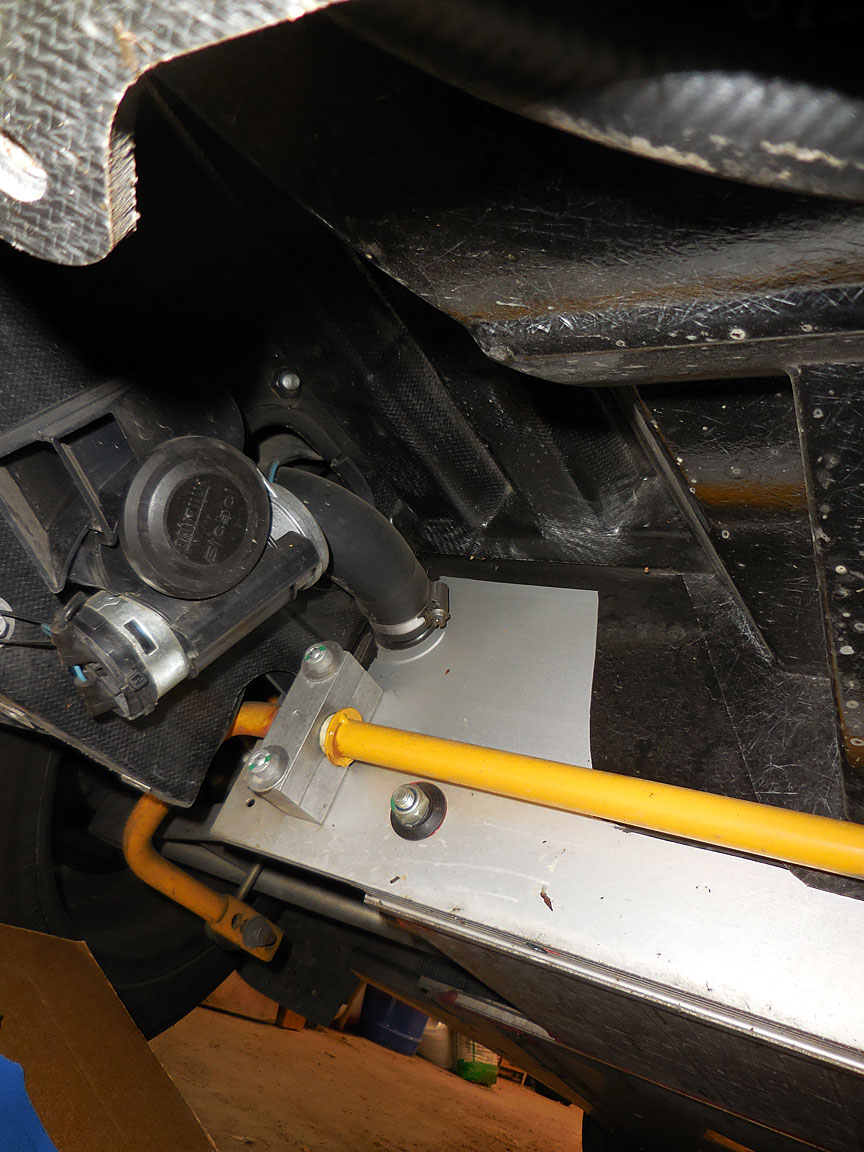
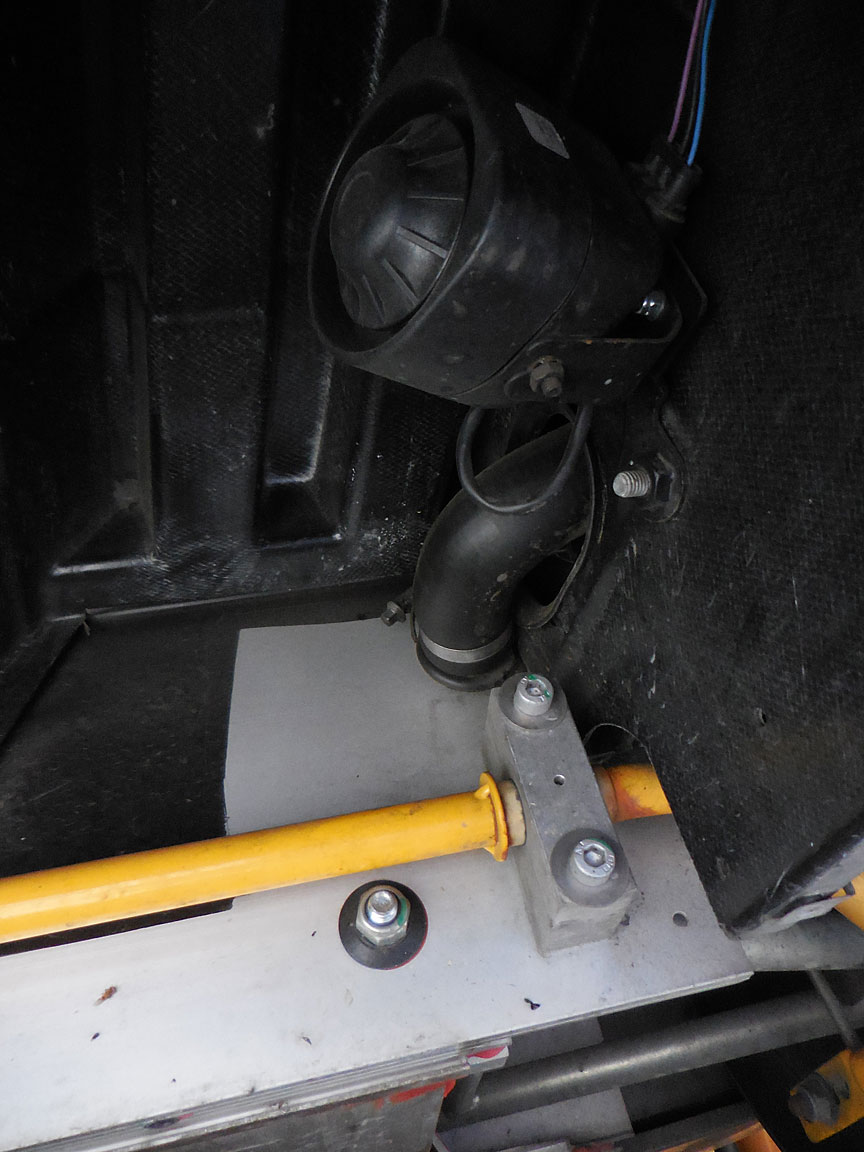
The right front coolant hose is attached to the tube above the sway bar mount. The coolant hose is partially obscured by my after market air horn.
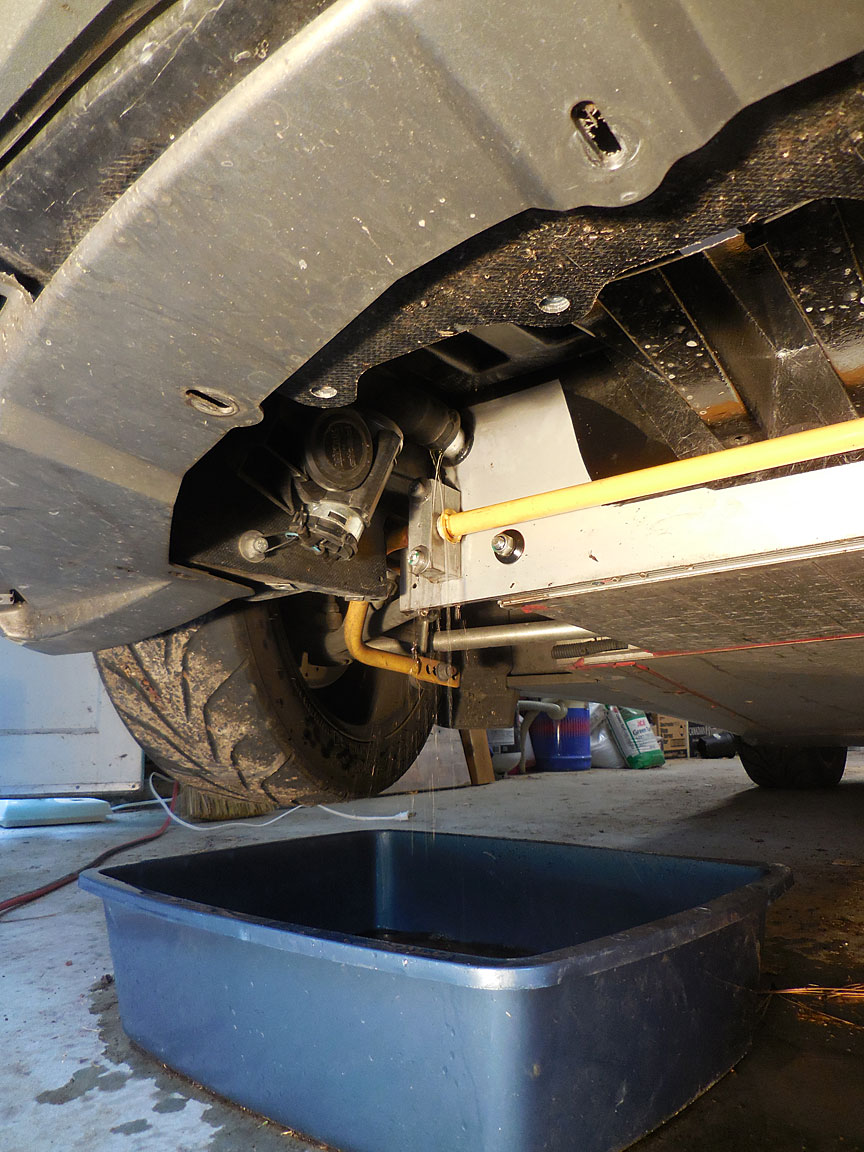
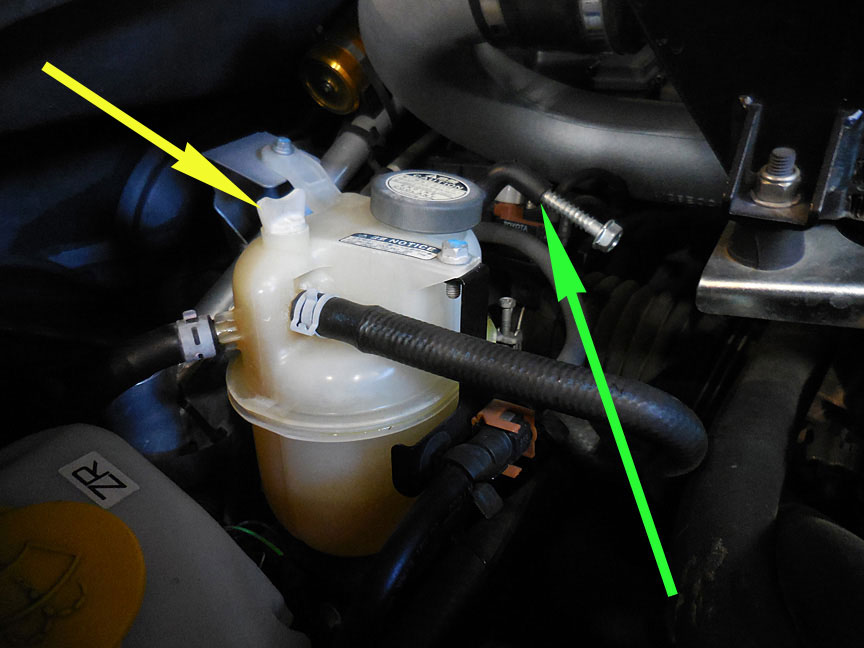
Again, remove the coolant hose and allow the coolant to drain. Remove the cap on the coolant reservoir and open the bleed valve as this will facilitate draining. Having two drain pans is helpful for the front, one on each side. Ideally they are shallow enough to fit under the car when the car is lowered, not tall like the one shown here. I used a shallow cardboard box lined with a garbage bag to catch the fluid after I lowered the front of the car.
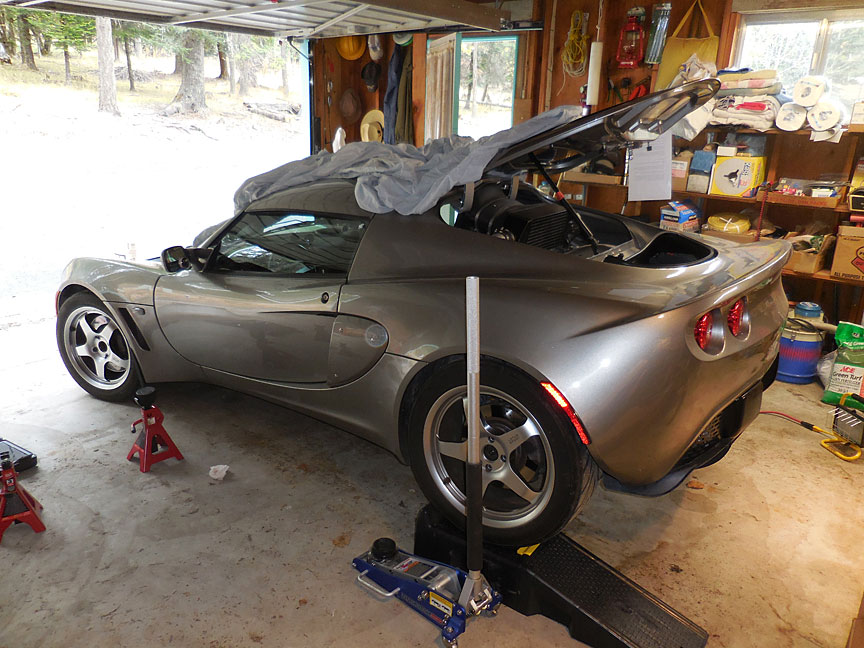
Lower the front and raise the rear. More coolant will drip out so be sure and have something short to catch the last bits. The car was jacked onto the ramps as I did not want to start the engine without coolant. It probably would have not done any damage for a short time needed to drive onto the ramps.

Remove the undertray. Review the bolt locations and sizes in the oil change reference page and above.
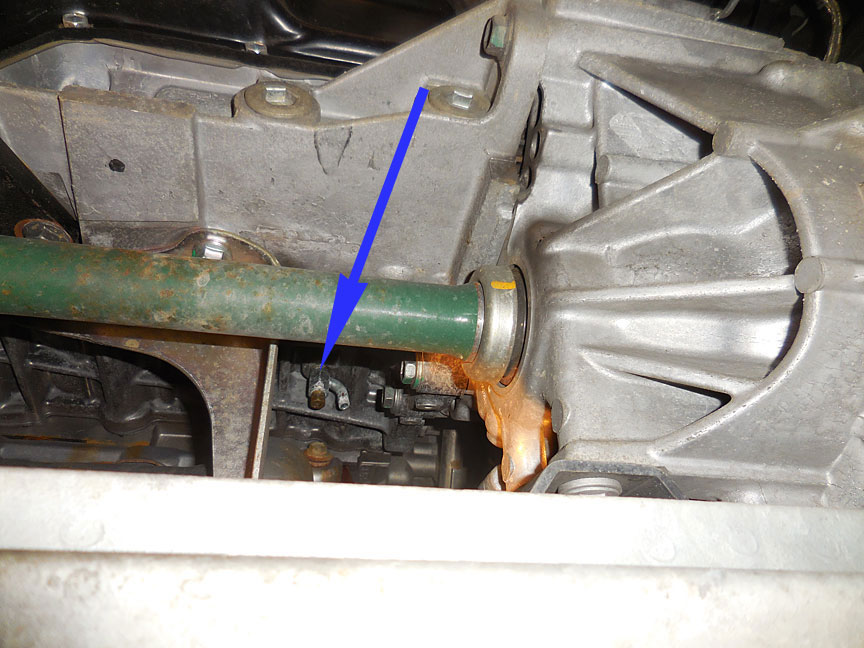
Open the coolant drain on the engine block. It is on the rear of the engine block about halfway up. Look past the half shaft (green) on the engine. It might help to put a spare rubber tube on the drain tube next to the brass hex nut in order to prevent the coolant from draining down the block. Unscrew the hex nuta couple of turns to open the drain and start the flow.
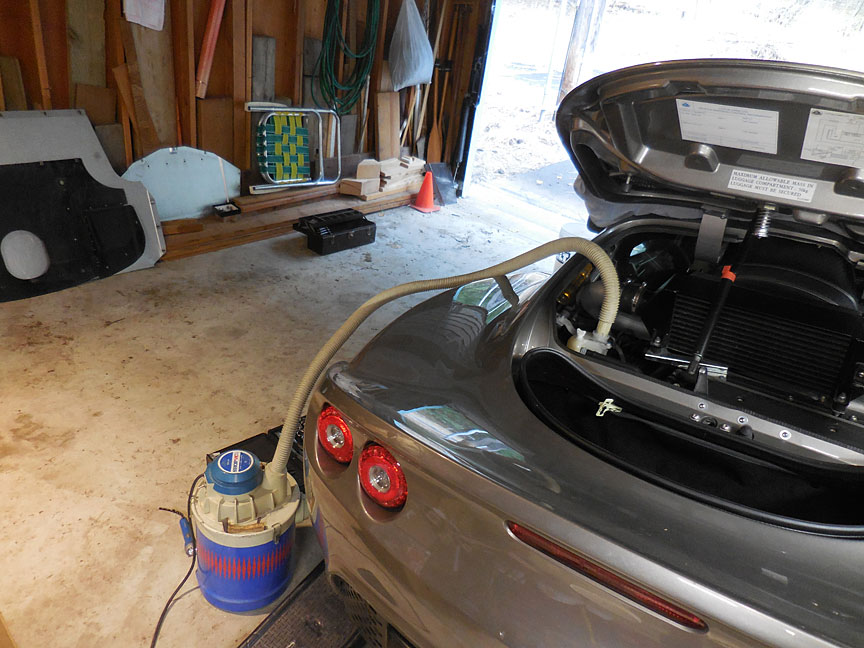
This step is optional but helps tremendously. Various components in the cooling system are not as robust as they could be. The maximum pressure normally encountered is only 15 pounds per square inch. Using a compressor to blow out the remaining coolant has the potential of breaking various parts like the overflow reservoir or the radiator. Both have plastic components and the reservoir is particularly susceptible to breaking.
What is needed is a high volume, low pressure source, like a shop vacuum. My shopvac, an antique, was perfect. I put the hose on the exit port of the canister so it would blow instead of suck. The diameter of the hose was perfect for the reservoir You can hold the nozzle near the opening to the reservoir but avoid a direct connection. This will reduce the pressure further, especially if you have a large, powerful vacuum. My nozzle was 1.25 inches in diameter and fit the opening of the reservoir, so you might be able to fabricate an adapter.
You can plug or clamp the reservoir overflow tube to provide additional pressure, see picture below. Later, when refilling, you will want to plug the overflow to prevent leaking.
Blowing encouraged the coolant to flow. A short puff would cause all sorts of gurgling and the level would drop. Another puff and more lowering of the level. Eventually exit air flow could be felt on the left coolant tube. After no further coolant came out of the tubes, I reattached the left coolant hose and used the air pressure to blow out any remaining coolant in the radiator.
Contents
In all I was able to get approximately eight liters to drain. I did spill some and so I estimate I was able to get about nine liters total out. (Later when refilling, I was able to fill with a total of over nine liters but again, I spilled some when refilling, see later.) The total capacity is 12 liters.
Refilling the Coolant
I wish I could say that assembly is the reverse of the disassembly. Unfortunately that is far from the truth. Here are the instructions on how to refill the coolant after draining.
Please let me know if these instructions were useful. Most of my tutorials assume a level of mechanical skill and may be difficult for beginners to follow. For the above tutorial I wanted to provide basic information and help people learn the maintenance skills needed to keep their car running. I will provide more tutorials at this level if this one is helpful.
Comments
Unfortunately the draining and refilling instructions are not specific. You can tell when the oil has drained out and the flow has slowed to a drip. The same cannot be said about draining the coolant. Please visit LotusTalk.com for instructions on draining the coolant using other tools. Please let me know if you have any comments on how to make it easier or easier to understand. I would appreciate specifics on the tools needed as I wrote this from memory and mine is not what it used to be.
Advanced Notes:
It is not necessary to turn on the heater in order to complete both the drain and refill. The coolant is always routed past the heater thus also always heating the passenger compartment. (This is why Tony (LotusTalk.com) developed a heater bypass kit, for those people in hot climates not wanting any heat to enter the passenger compartment. I am uncertain what changes to the drain and refill process are required.)
Speeding the engine will cause the temperature to change more rapidly. The temperature will increase as the car warms up but will suddenly drop again when the thermostat opens, and then will slowly increase again.
The Lotus coolant reservoir deteriorates rapidly. Many owners are finding the plastic is crumbling and the unit frequently leaks. Mine showed significant problems even when under slight pressure.
There are kits to facilitate the refilling of coolant into a system such as the AirLift Refiller. It costs around $80 and works by creating a vacuum in the coolant system. Once all the air is removed, you connect it to a source of coolant which then rushes in to fill the void. It greatly reduces the bubbles and the need for bleeding. Unfortunately it puts the coolant system under stress and there is the potential for broken parts.
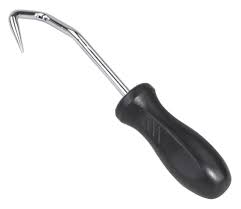
This is a radiator hose removal tool. You can insert the point into the end of the hose and then wiggle the handle around, removing the rubber that is stuck on the tube.