
Front Clam Removal
These instructions include the front clam removal instructions from the Lotus Service Notes, section BR, pages 9 and 10. Unfortunately the instructions in the manual are not complete. I have included hints on how to accomplish certain difficult tasks.
Numbered items are from the manual and my additional comments are preceded by bullets. Items in parenthesis are tools required for the fastener. My car has dual oil coolers and the instructions and pictures are specific to the car. I took about three hours to remove the clamshell and another three to replace it. The only steps that are difficult are six and ten.
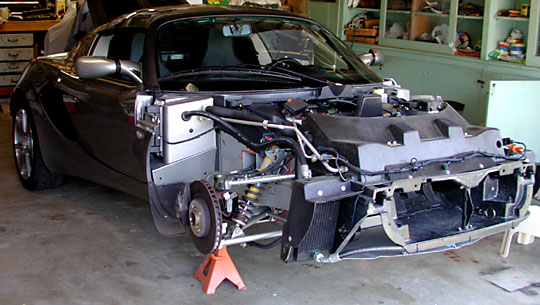
BR 6 - Front Clamshell
The front clamshell is a bonded assembly of several glass fibre composite mouldings incorporating both front wings, the front access aperture, radiator air intake and head lamp housings. The clamshell is secured to the windscreen frame, radiator mounting panel and other panels using threaded fasteners for ease of removal and to facilitate service access and body repair.
To Remove the Front Clamshell
- Raise front of car by jacking at the middle jacking point and placing jack stands at both of the front jacking points.
- Remove both front wheels. (17mm socket and key tool)
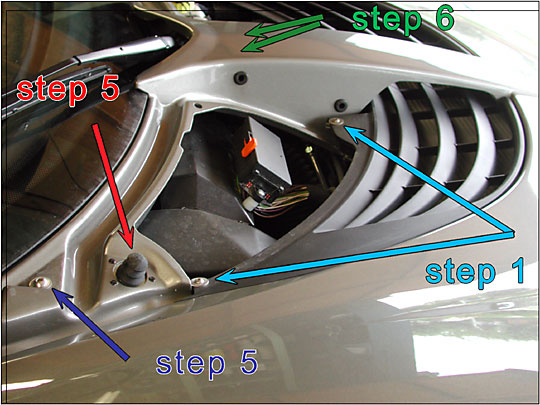
step one is grille removal
step 5 (red) is security switch
step 5 (blue) is fastener
step 6 is hidden spine nuts
1. Remove both front body access panels. (Allen wrench, included in tool kit)
- Remove radiator exit grilles. (3mm Allen wrench)
- Remove left and right radiator shrouds.
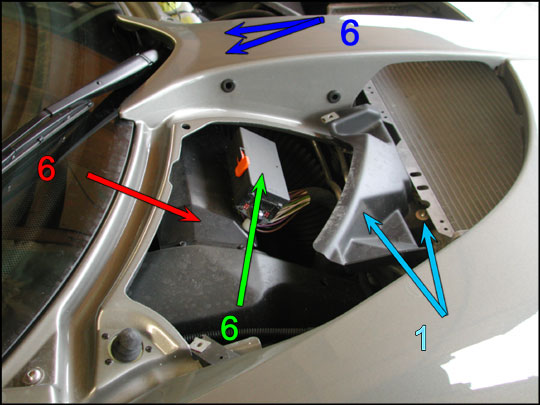
step 1 is radiator shroud
step 6 (red) is wiper shroud
step 6 (green) is fuse box
step 6 (dark blue) are hidden spine nuts
2. Remove both front wheel arch liners.
- Remove both the front and rear arch liner. There are six fasteners, five expansion screws and one metal screw. (Phillips screwdriver)
- See pictures and fastener information for this step on the headlamp alignment page.
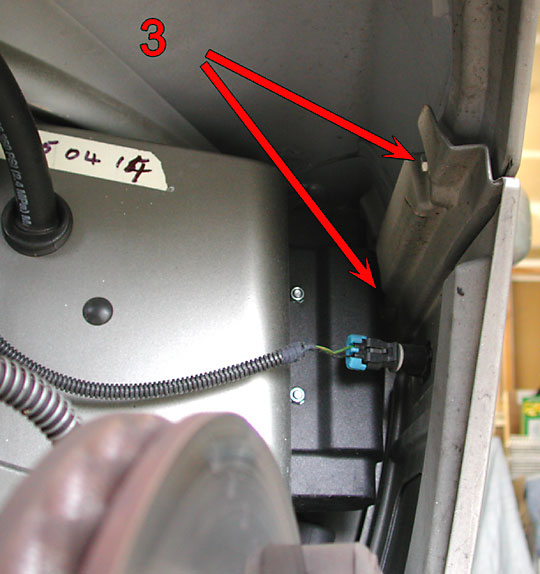
step 3 is hinge access panel to clam attachments
from front wheelwell opening towards hinge
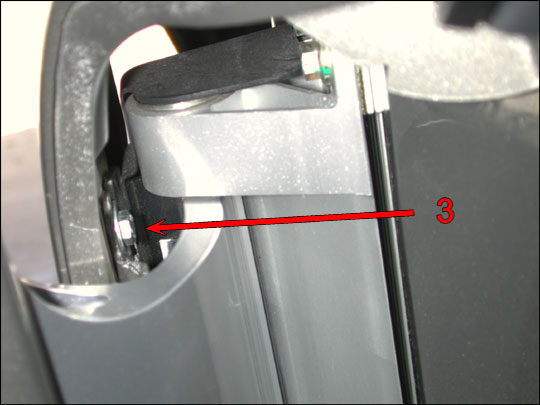
step 3 hinge panel to front clam attachment
looking from door hinge towards front
3. From inside each wheelarch, remove the single screw securing the top edge of the door hinge cover panel to the clamshell. On cars fitted with front mounted oil coolers, release the hoses from any clamshell clips around the top of the wheelarch. (10mm hex head)
- There are actually two screws with the second also being along the edge and accessed from the door hinge side. Take care to catch the shims that may be included in the fixing. If they fall, you will need to remove the door hinge cover. (10mm Allen wrench)
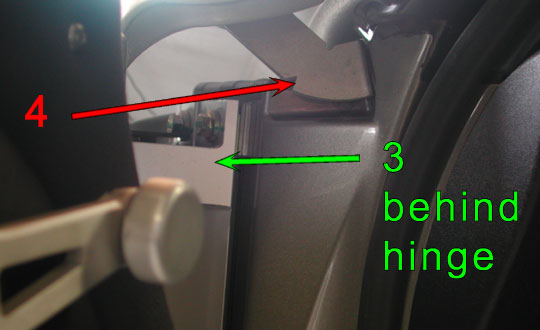
step 3 (behind hinge) is hinge access panel to clam attachment
step 4 is base of windscreen attachment bracket for clam
4. Via each door aperture, remove the single fixing securing a bracket at the top rear corner of the clamshell to the base of the windscreen pillar. (5mm Allen wrench)
- This fastener is not visible and is hidden behind the bracket.
- Count the number of shims between the bracket and the body. Take care not to let the shims drop between the body and the frame.
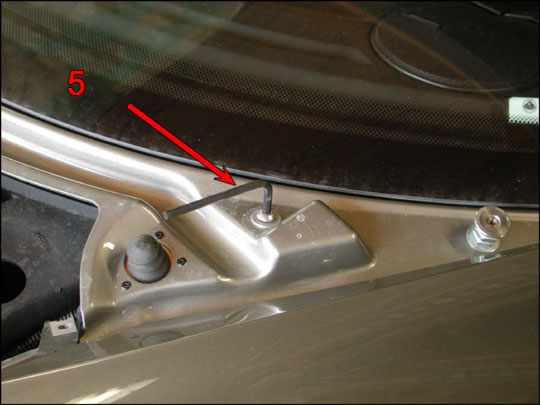
step 5 is clam attachment at windshield
5. Remove the fixing at each side securing the clamshell to the bottom of the windscreen frame. (5mm Allen wrench)
- Unplug the security switches that detect the opening of the access panels.
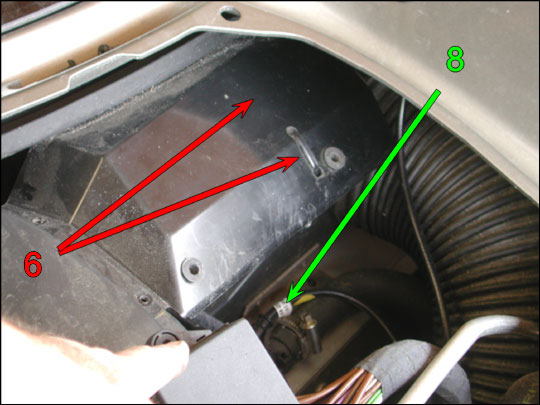
step 6 remove wiper shroud to get access to spine nuts
step 8 is aerial connection
6. Elise: Remove the two nuts securing the clamshell spine bracket to the wiper motor bracket extension. (10mm socket) (The nuts are underneath the area where the green 8 is above.)
- This is extremely difficult. The nuts are blind, there are two side-by-side, and there are parts in the way preventing movement of any tool. I accessed both from the right side of the spine. Care must be taken not to disturb the air line that is also attached to the bracket.
- Be very careful not to drop any parts as they cannot be retrieved with out more difficult disassembly.
- I also removed the fuse box and wiper motor shroud in order to gain more space. The tie wrap that holds the wiper motor shroud can be cut and easily replaced later when assembling the shroud as it wraps around the wiper motor itself.
7. If fitted, remove the single fixing at the bottom front of each wheelarch, securing the clamshell to the radiator panel extension (not sued in oil cooler cars). (I do not have this fitting and do not know the tool required. If you do this and have this fitting, please email me what tool might be required.)
step 8 is front clam attachment point
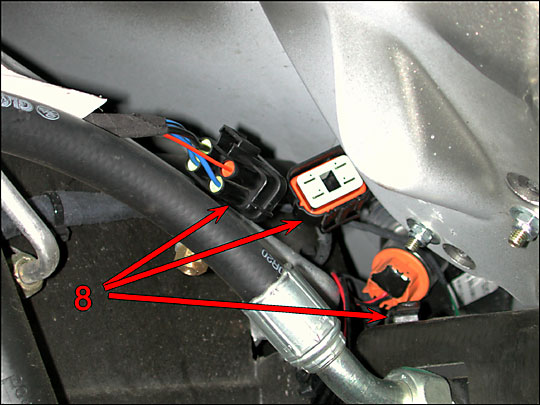
step 8 is disconnect wiring harness
bottom points to turn indicator plug
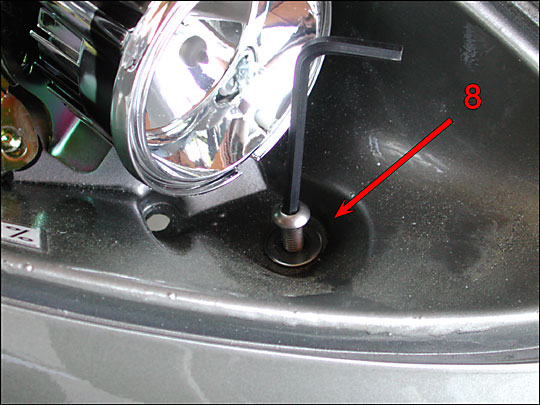
8. Remove the headlamp cover/mask assembly from each side by releasing the three socket head screws inside the wheelarch. Remove the clamshell fixing at the front of each headlamp housing. Release the headlamp harnesses, and feed through the clamshell hole. Disconnect the aerial lead(s). (5mm Allen wrench)
- See my description for aiming the headlamps for pictures and information on removing the headlamp covers. The top screw has the washer on it to help locate the bracket.
- I unplugged the lamp assembly from the wiring harness, accomplished by looking under the clam in the area behind the turn signal indicator. Both the headlamp assembly, the turn indicator, and the side marker lights need to be disconnected. This is easier than feeding a plug through the rubber grommet as described by the instructions.
- The aerial plug is just below the wiper motor assembly.
- Take careful note of the rubber isolation washer between the clam and the crash structure in the area of the bottom of the lamp assembly.
step 8 clam to allow bottom
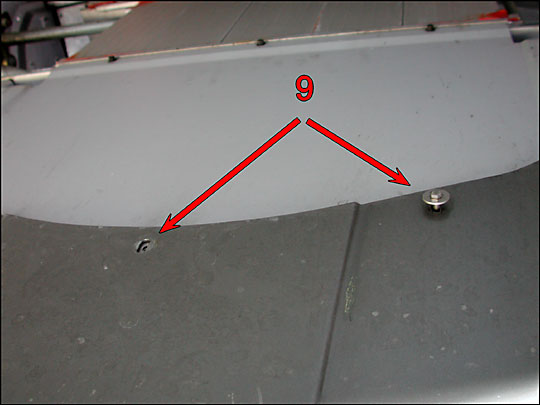
9. Beneath the nose, release the screws fixing the front lower edge of the clamshell to the alloy undertray. (3 x 8mm socket)
10. Lift clamshell from car. Note any spacing washer or shims fitted at any fixing point.
- Sure, no problem! Actually, there are many things that will prevent the easy removal of the clam. Pull out and lift the portion that is above the door hinges.
- Pull bracket away from windshield surround (step 4).
- Lift the spine and make sure the two bolts are free of the wiper motor bracket (step 6).
- Shake a bit, loosening as much as possible.
- The front edge of the radiator exit has a lip that fits against a similar lip on the crash structure. The clam needs to be raised over this lip. However the bottom front of the clam lip is outside of the alloy pan of the car and prevents the clam from being raised. Pull up and forward on the clam in the area of the radiator exit.
- Find all fasteners, isolation rubber washers, and shims you missed when removing the original fasteners.
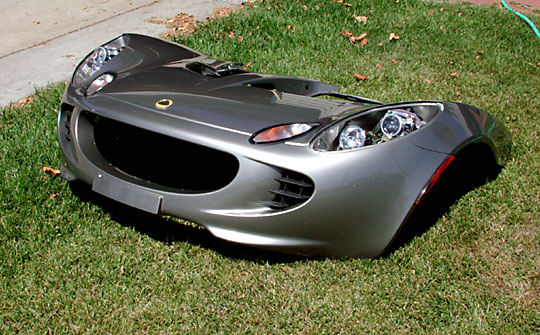
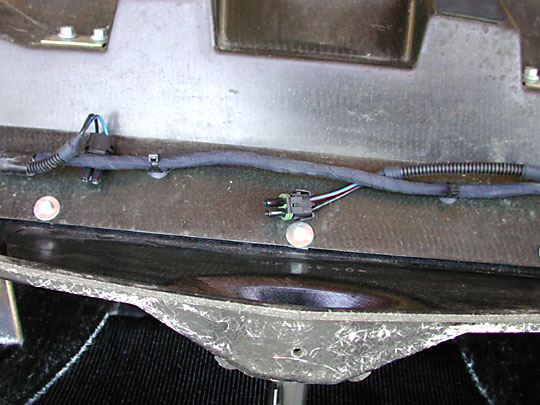
What Does It Look Like?
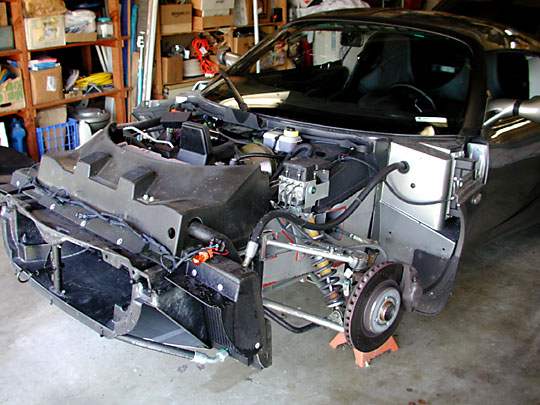
Note the two plugs on top of the radiator intake opening. These plugs get battery power when the high beams are energized.
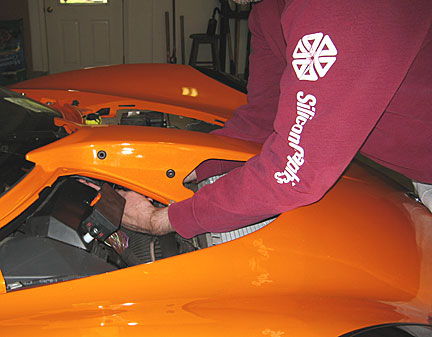
Assembly
Yes, it is the reverse of disassembly. Some care must be taken when inserting some of the shims and tightening the fasteners. Panel gaps must be even and surfaces must be flush. I was able to improve upon the original fit and no gaps were difficult to fix.
I also changed the horn for one that is more powerful.
I also removed the grilles in front of the oil coolers and substituted welded wire mesh.
Additional Comments
Bob Miller also removed his front clam. He had some additional comments:
Step 1. Radiator exit grills need a 3mm Allen wrench.
Step 3. I found that loosening the rear bolts through the door openings was the hardest part of the whole job. I was only able to turn them 1/12th of a turn at a time with an open end wrench. When I was reassembling it, I ended up doing each bolt three times. If you found a tool that worked better than an open end wrench, I'd love to hear about it.
But enough whining. What I'd like to share is that you don't need to completely remove that bolt. If you open it five or six complete revolutions, that's enough to slip the clam off. Then there's no danger of losing the bolt, washer, or shims.
Step 6. You wrote that this was the hardest part of the job for you. I was able to get both hands into that area along with a ratchet handle, and those bolts came off relatively easily. I didn't have to remove the fuse box or wiper shroud.
I stood in front of the car, slipped my left hand in past the fusebox, and my right hand in from the front, with my elbow over the radiator. The wrench handle was pointing toward the car's nose, and I held it in both hands.
Also, thanks to your warning, I threaded some masking tape into the area and taped down the washers before removing the clam, so they wouldn't fall. I also taped them down before reinstalling the clam.
Bob, aka kbob on Elisetalk