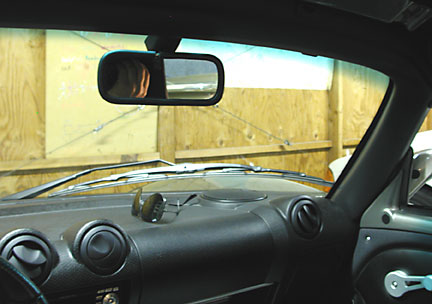
How to create your own inside mirror:
The original mirror for the Lotus Elise is huge, over 8 inches wide and very tall. The seating position, especially when raised as mine is, puts the driver in a position where the large original mirror obstructs a significant portion of the view. Additionally, the outside edges of the mirror reflect the head rest of the passenger seat or even the head of a passenger if you have one and your own head on the other side!
I wanted a smaller mirror. Note the Sector 111 also provides a smaller replacement mirror that can be bolted in without modification. I did not like the oval shape or the position of the Sector 111 mirror and decided to make my own.
The shoe that attaches the original mirror is not a standard one found in the United States. I did not want to glue on a second shoe and decided to see if I could use the existing shoe.
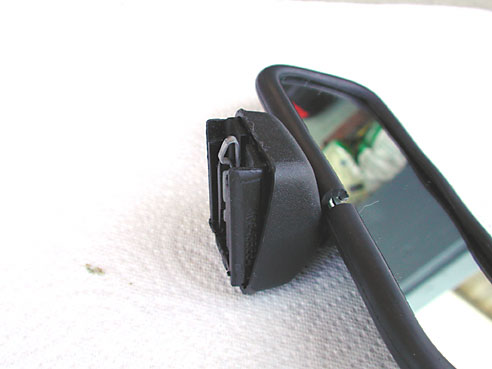
The original mirror can be removed by the pushing the outside shell down, away from the glass. This exposes the metal finger that needs to be pressed down, away from the glass, in order to release the mirror from the shoe. This can be accomplished more easily by viewing the mirror from outside the windshield. I used the long end of a small allen wrench to depress the finger.
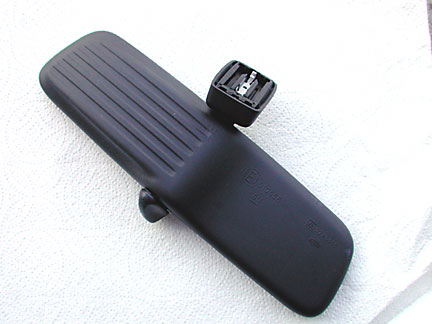
The original mirror consists of two flat pieces, one holding the glass of the mirror and the other holding the ball joint to allow for adjustment and the knob that tilts the mirror slightly. These two parts can be pried gently apart, exposing the inside mechanism.
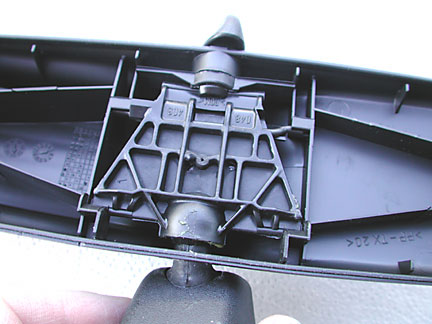
My goal is to remove the girder and the ball joint as a whole and mount a new mirror on it.
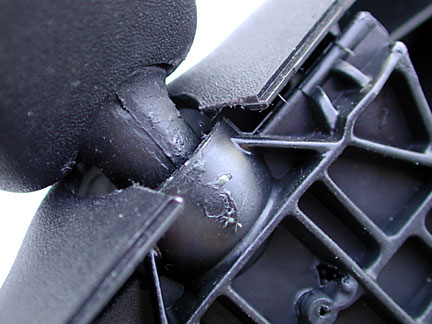
The day/night knob can be twisted off. The ball joint is pressed into the girder and could be forced. However I decided to cut a notch in the rear housing and let the girder slip out. The notch is shown above.
I sourced my new mirror from Victoria British, a supplier of parts for old British Cars. The mirror I liked was for an old Austin Healy, however mirror material can be found at your local glass store. My new mirror is four inches wide and 2.5 inches tall. It is still a bit too tall and I might try two inches next time.
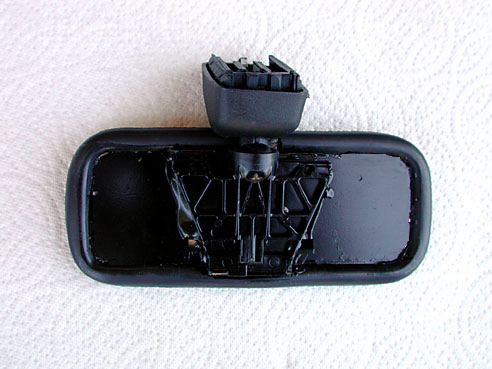
The mirror material is deposited on the back side of a pane of glass. It is fragile and needs to be protected. I used a piece of metal cut to the same shape as the mirror. I glued this metal to the girder of the original mirror. Notice how the backing is glued close to the mount which keeps the mirror very close to the top of the windsheld. This allows the driver to see under the mirro better, giving a more unobstructed view outside.
It is also possible to drill a hole in the girder and mount any number of after market hot rod mirrors, which was one of my first solutions.
Once the metal backing is attached to the girder, the mirror is mounted to the metal backing. I used a slit piece of 1/4 inch fuel line. I attached it to the edge of the mirror and metal backing, with the slit holding the two together, with a high tech glue specifically for rubber, 3M Scotchweld CA40. Hot glue probably would work as well as there is not much stress on the fuel line. I painted the back black to hid my poor glue job.
I prefer a professional solution, with a proper shoe to mount the mirror and a proper mirror. Unfortunately none was available when I need it. This solution is very light, less than original, adjustable, and uses the original mount. While it looks home made, it is still functional.
