Raising the Seat
I found I was unable to see all the cones during my first autocross experience as the left mirror was blocking the view. A tight left turn, caused the car to roll, raising the left side and left mirror. I am 5' 10" (178cm) and some of my height is in my legs, resulting in my head being a bit low.
I measured the space between the top of my helmet and the bottom of the hard top, with the seat in the correct position from the steering wheel. There is almost 40mm of space. I decided to raise the seat 30mm.
I removed the existing bolts that hold the seat track in place. (Please let me know if you can interpret the grade markings below and I will update the page to include them.)
| rear | front | |
| left | 8mm x 20mm, cap head (12.9) | 8mm x 25mm, hex head (8.8) |
| right | 8mm x 20mm, cap head (12.9) (blue thread lock?) | 8mm x 25mm, hex head (8.8) |
I bought grade 8 bolts, all 30mm longer than shown above. There appears to be room to make the bolts an additional 5mm longer but I did not examine the depth that closely.

original and longer bolts, left are fronts, right are rears
Caution should be exercised when removing the existing bolts and putting in the new. It is not clear if the nuts under the floor are captive or if they will move into hidden places.
The left rear bolt has a washer above the track. The right rear has a tab that appears to act as a stop when the seat is pushed all the way back.
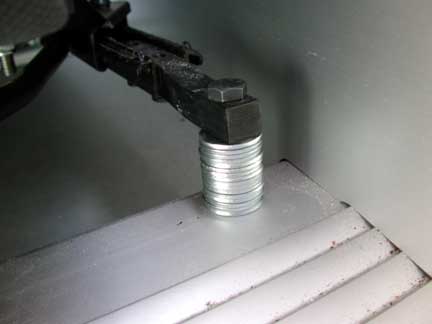
I used a stack of washers to space the seat upwards. The washers were only a temporary solution, allowing me to evaluate how high the seat really needed to be.

I decided this height was sufficient for me to see over the outside rear view mirror and still see under the inside rear view mirror.

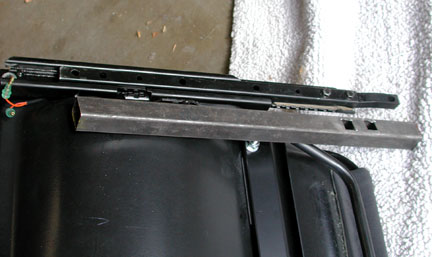
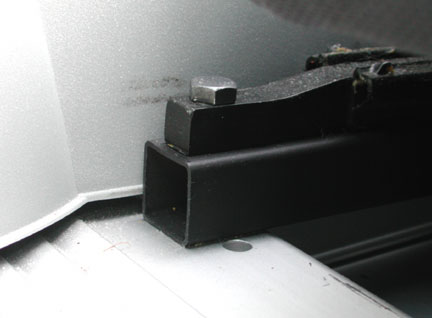
The driver's seat will be raised the same way the passenger seat is mounted, on a square tube section. While the passenger seat is mounted on aluminium, the drive's seat will be mounted on one inch square section steel tubing. Lotus extended the seat rack by adding a goose neck extension, mounted with two bolts. (See upper right portion of picture above.) The goose neck portion effectively raises up the front of the seat rack, making the seat raise when adjusted forward.
The square tubing will interfer with the mounting bolts for the goose neck and so holes were cut in the square tubing.

Some people will tell you the visibility out of the Elise is just fine and that perhaps you are just not looking far enough ahead. I found I was looking farther ahead than many expected and my vision was blocked out the side windows by the side mirrors. Raising the seat helped tremendously as I can see over them, especially when the car is leaning in a turn.
SAFETY NOTICE: Raising the seat provides an additional lever arm that can put additional stress on the attachment point at the floor in case of an accident. I did not crash test my car with this modification and I assume no responsibility if you make this modification.
Note; The top of the seat will not fit under the inside roll bar location. While adjustments can be made to the rake of the seat using this method, by adding different lengths of spacers to the front and rear, care should be taken not to rake the seat back too far.
One of the advantages of raising the seat is the ease of entry and egress!
