
Exige Coolant Tank Replacement
(This should work for the Elise as well.)
The coolant tank on the Exige and Elise is made from a plastic that deteriorates over time. The tank will split and start to leak around the center seam. Evidence will be coolant collecting on the bottom of the diffuser pan on on the ground, under the tank.
There are several suppliers providing replacement tanks. At this writing, May 2018, the original equipment tank is over $130. Radium, Moroso, and others provide welded aluminium tanks. I picked Moroso because it was less expensive. I found it on Amazon for a bit over $200 including shipping and purchased it from Jeggs because they are willing to price match.
Moroso provides a nice set of instructions. morosocoolanttankinstall.pdf However there are some things that are not mentioned or will be a bit more difficult to accomplish so I created some additional notes.
Removing the Old Bracket
It will help to start and later to finish if you remove the windshield washing pump and reservoir. Unfortunately it is difficult to remove it at any time and again difficult to install! The tank is removed by simply lifting it up and sliding it out. The windshield washer pump has a plug that is similar to the coolant recirculation pump plug which must be removed.
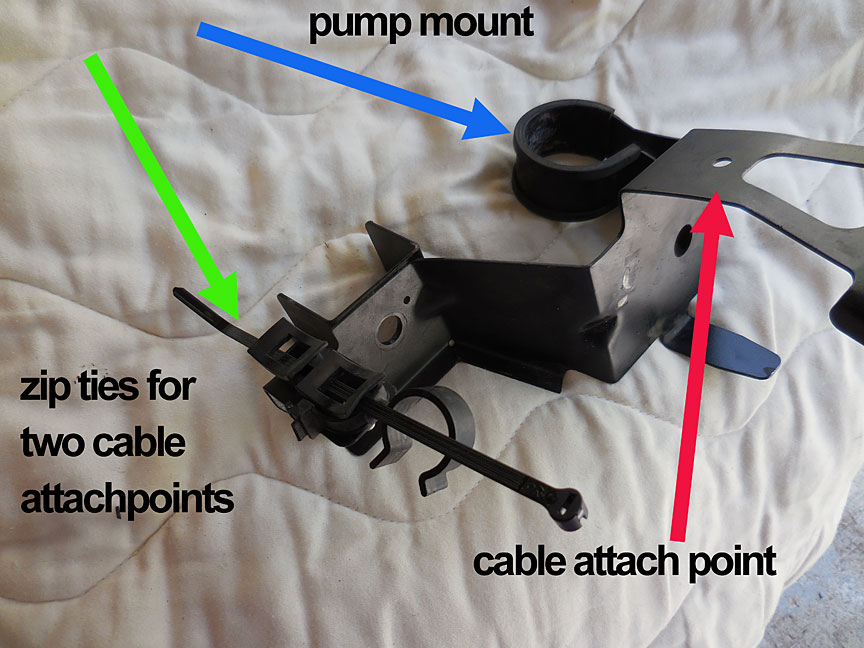
This is what the coolant bracket looks like. The platform for the plastic tank is on the right. Hidden under the bracket is the isolation mount for the coolant pump that circulates coolant after the car is turned off. On the left is a mount for two hoses which are attached using a zip tie. Finally there is a hole allowing an expandable plastic mount for another cable. During removal the pump mount needs to be loosened by removing a bolt on the opposite side of the clamp, see below. The original zip tie needs to be cut. And the cable attachment needs to be compressed back into the hole and pulled free.
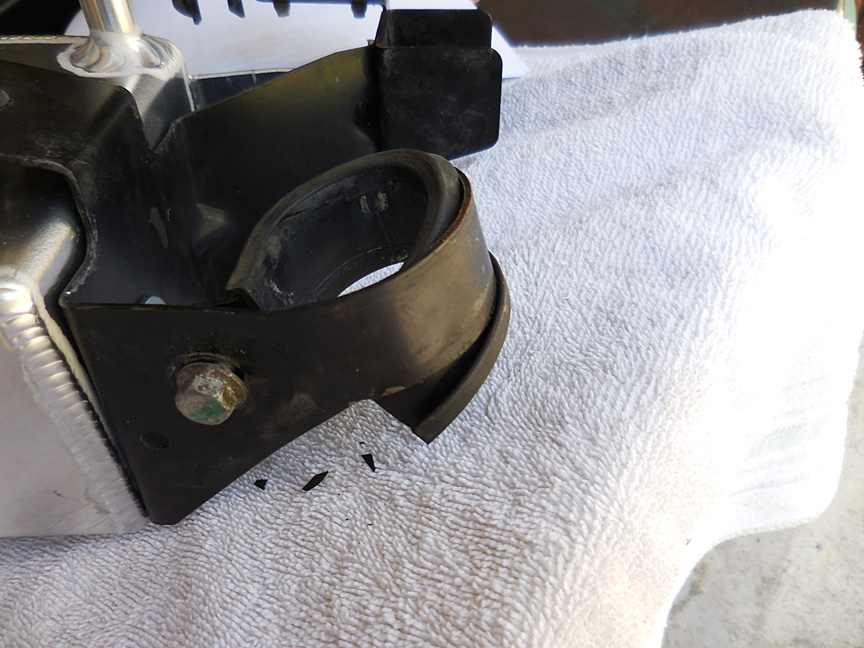
The rubber gasket on the circulation pump will come off the metal strap, making removal of the pump difficult. Be sure to reposition the rubber and to clean the pump in order to make replacement easier. I took the tightening bolt out completely to aid in the removal. Installation will require the fitting of the bolt prior to insertion of the pump.
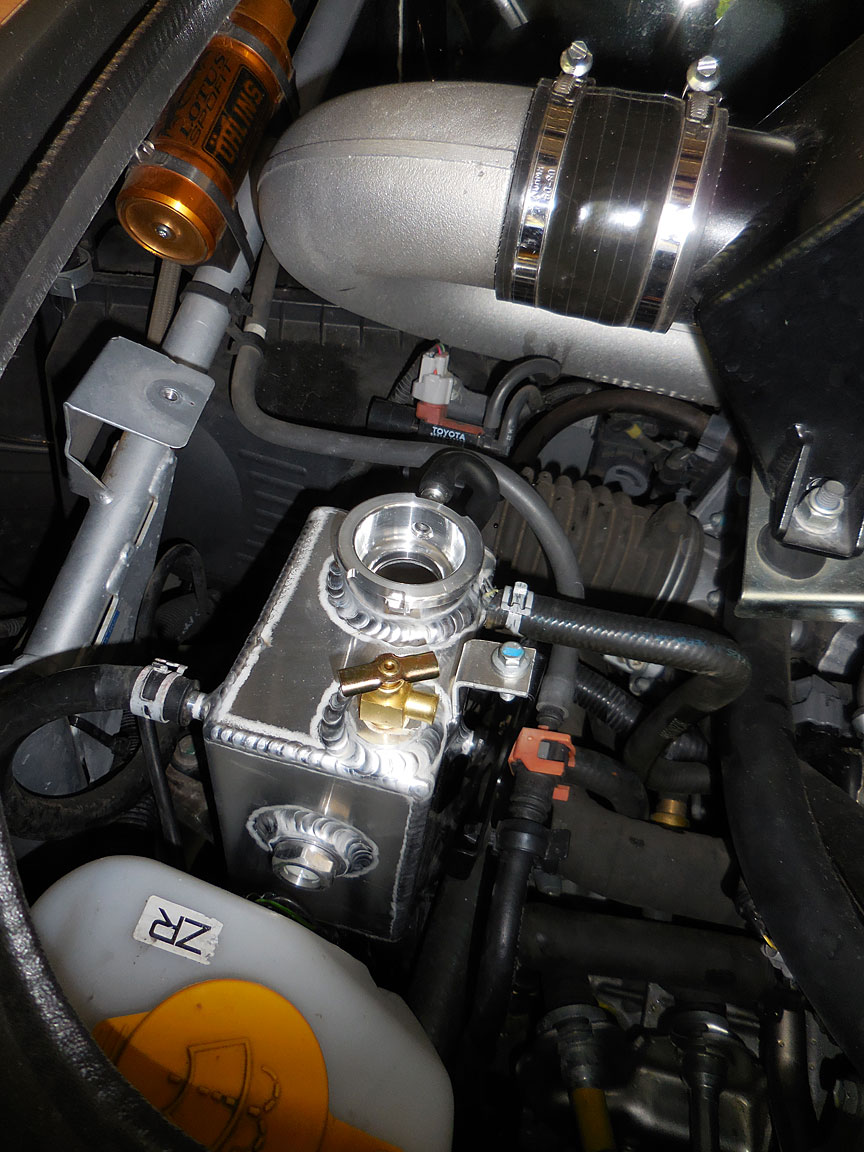
Note how the new tank is not mounted square to the bracket, more later.
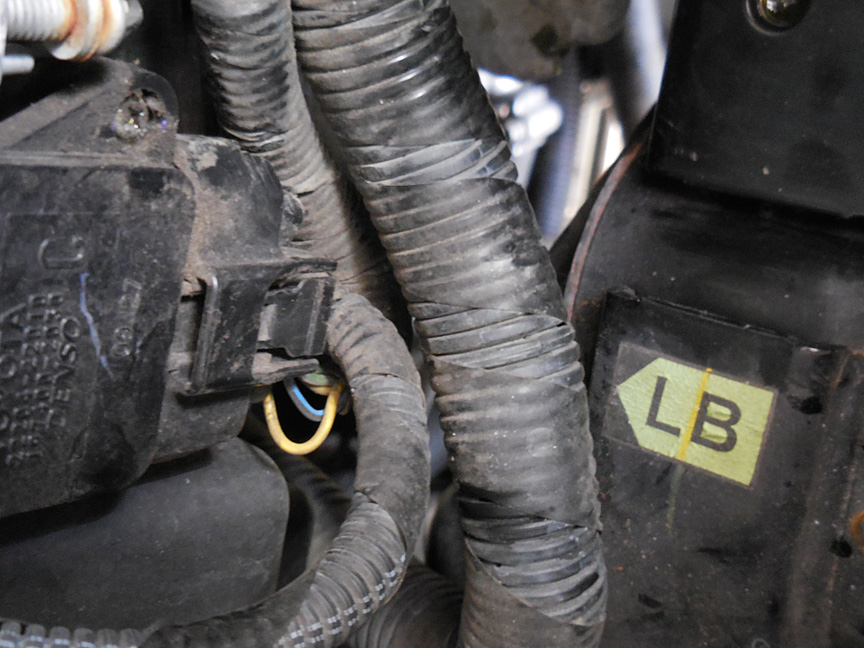
Take care not to move the wire cable back and forth near the plug on the mass airflow sensor. You need to wiggle the cable to remove it from the cable attach point on the bracket. It might be easier to remove the plug and reinsert it later once the bracket is attached.
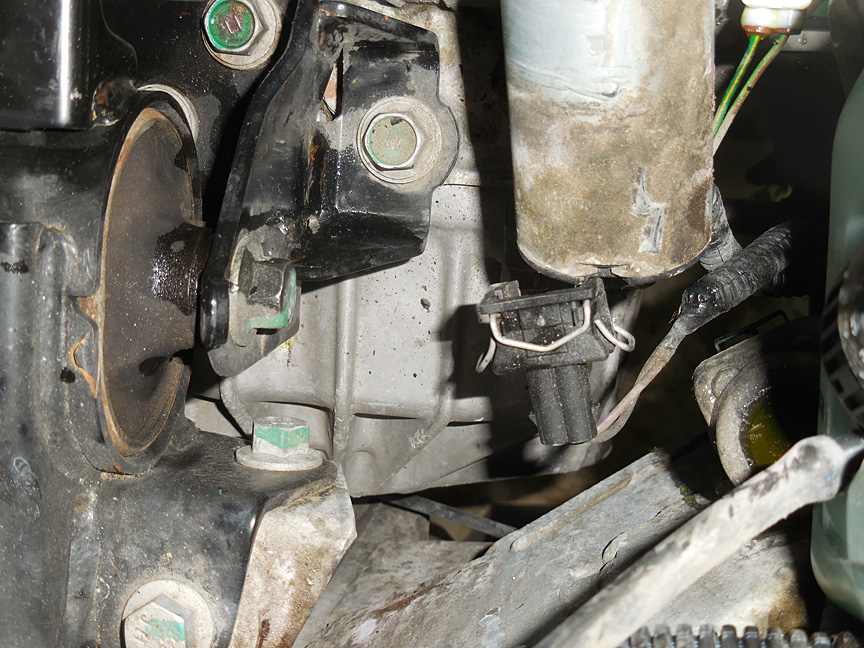
The plug shown center right goes to the recirculating pump, the cylinder just above it. The plug is removed by pressing the two loops on either side together. Some strength is required pressing them together before the plug can be released.
Installing the New Tank
Add lightness. The old tank weighted 456 grams and the new was 779 grams. I should have weighed them both with liquid as I suspect the Moroso tank carries less and the net effect might be negligible.
Make sure all the fittings on the new tank are tight before installing it. There is nothing worse then finding one is loose and leaking after installation. (The instructions from Moroso imply that the fittings are added by the purchaser. My fittings were installed prior to deliver and the bleed fitting was not tight.)
The Allen bolt mounting the tank to the bracket was a 1/4" hex. It is unfortunate that Moroso did not include metric hardware.
I hate the original equipment hose clamps. They pop out away from the pliers when trying to loosen or move. I suggest you purchase some small banjo fittings to replace the old clamps.
Installing the new tank and bracket is just as difficult as removing the old bracket. It is difficult to wrap the new zip tie around the cables, push the expanding plug that mounts the cable on the right, and difficult replacing the windshield washer tank and pump. Plugging in the connections to the recirculation pump and windshield washer pump was especially difficult since they do not just click on place but must be squeezed to slide on.

The sight glass on the side of the new tank provides a way of quickly checking the level of fluid in the tank. Unfortunately it is obscured by the windshield washer tank. The design does accommodate this problem slightly by having a white plastic disc on the inside, providing some contrast with the lime green coolant color. I also tried to improve the access to the sight glass by slightly rotating the tank to the left. This did not work because the range of motion was minimal. Perhaps we will need to carry a tongue depressor stick with us and then use the old dipstick method of determining fluid level.
The sight glass is assumed to be at the bottom of the cold coolant level. Once the coolant is hot, the sight glass should be far below the level of the coolant.
Fill and bleed are the same.