
Assembly
I assemble the game many times to make sure that all the parts fit correctly and everything works smoothly.
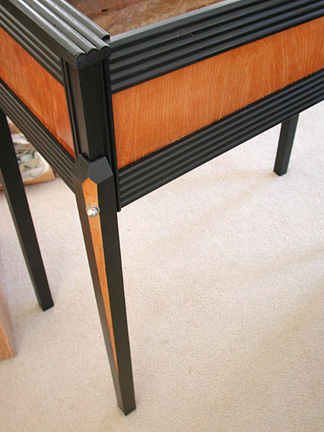
The legs are installed and then later removed. They are not original but look close. The center slash of clear wood is not the same color so it was sanded and stained a darker color. The cabinet was not evenly finished so one side is darker than the other, making it difficult to match the color on the legs. The door is a reproduction and is the lightest panel on the game. The legs were stained somewhere in the middle.
You can see the satin wood finish on the rest of the cabinet. It will be waxed before final delivery.
Ball Returns and Shooter
The ball return casting and the ball feed are clean and re-installed. Because the interior of the cabinet looks so different from the outside, again because of water damage, the interior was painted a flat black. It is important to make the restoration balanced, with no part or surface looking either worse or much better than any other. This is especially challenging when a large portion of the game, the black painted area, needs to be completely refinished.
Reset Levers and Damper
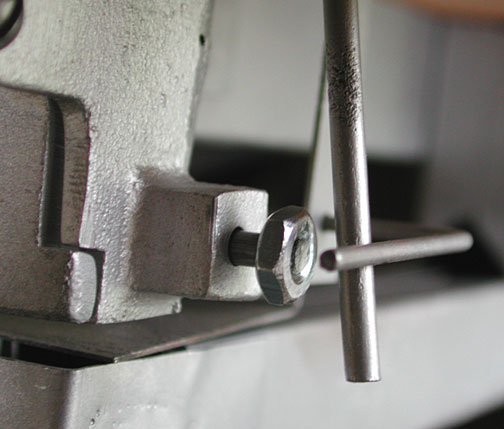
The playfield is finished, both top and bottom. I used Nyloc nuts on the lever pivot points rather than the original double nuts twisted against each other. This modern solution is more reliable and easier to adjust. The top Nyloc nut is on the bolt that was re-welded.
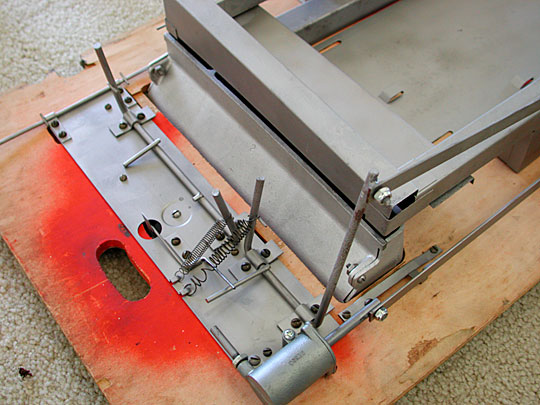
The reset coin slide pushes on the two levers with springs. The bottom one opens the ball return holes and resets the tilt ball. The pump or damper at the bottom insures the slow and gentle return so as not to disturb the tilt ball. The long bolt at the bottom of the damper adjusts the amount of air expelled from the damper, slowing it down as you close the hole.
The top lever prevents any balls from being fed onto the playfield, thus keeping the player from cheating.
Reproducing the Stickers
The original sticker was almost black with age. I scanned it in and started to create the artwork needed to reproduce it. I was surprised to see the words, "Machine Locks After 3 Outs!" When assembling the game, all I noticed was the out tray and no mechanism that might lock the game. Read on.
The artwork on the pricing sticker was difficult to reproduce accurately because there were concentric circles of increasing width. One pixel width circles were still too wide. I came close with some anti-aliasing to help.
There was a portion of an NRA sticker at the top. Artwork for the NRA was found and compared to the small portion remaining of the original sticker. This artwork was cleaned and prepared.
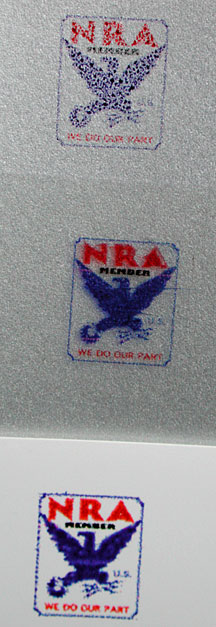
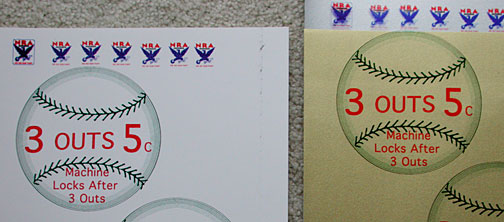
The NRA sticker was on silver foil paper and the pricing sticker was on gold foil. The artwork was output on three different mediums.
The top sticker is directly on the foil material, basically a silver painted paper available at the art store. I did not expect it to work. It shows the poor cover of the paint as it does not get absorbed by the plastic.
The second sticker is printed on to a new 3M material that is good for ink jet, laser, and pen output. The transparency is put on top of the same foil paper to show what it might look like as a finished sticker.
The third and final picture shows the artwork printed on decal paper. This paper is a thin layer of plastic material backed by paper. It is similar to what is found in model kits. Decal paper comes in clear and white. White is required if any of the artwork is white as most printers are not capable of printing white or very light colors like yellow.
Once the image is printed on decal paper it must be clear coated with a clear spray paint in order to waterproof the artwork. Once dry, the decal can now be cut to size, moistened, and slid off onto the foil paper.
I liked the decal best and installed it in the game. I used silver foil paper for the NRA sticker and gold foil for the pricing sticker.
Three Outs Locks Game?
The newly reproduced sticker suggests the game will lock when there are three outs. Three outs is indicated when there are three balls in the out portion of the tray. There was no mechanism in place that might indicate how the game was supposed to do this!
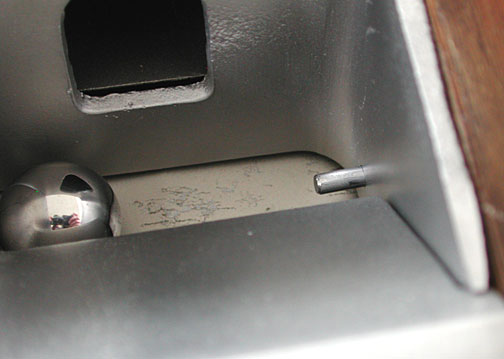
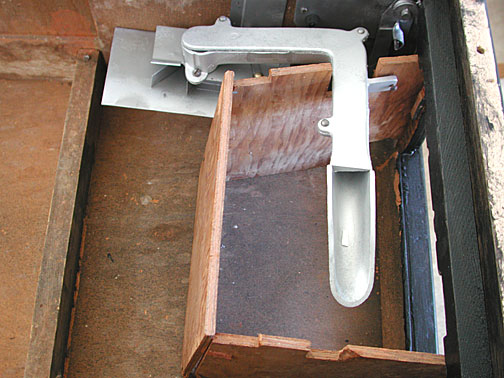
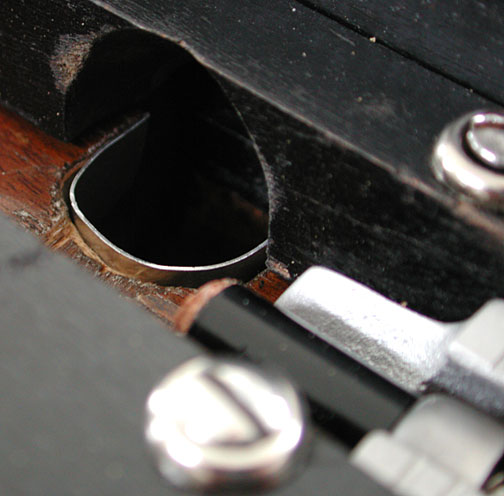
There was a hole through the right side of the out tray. Looking at the other side, visible from underneath the playfield, showed some levers.
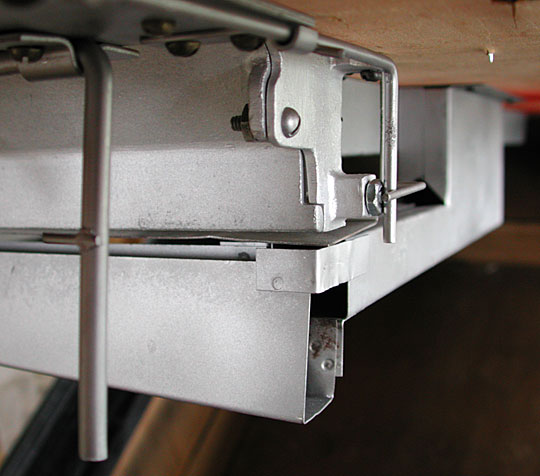
On the back side of the hole is a boss and a couple of levers. The pin will not fall out of the hole towards the right because the levers are limited in travel and restrict the pin. However the pin could fall into the out tray. To prevent this, I tapped the 1/8 inch rod with threads and screwed a nut on the end. I also turned the nut on a lathe to make sure the flats would not hang on the two trip rods shown above.
The vertical trip rod is part of all the levers shown on previous pages and moves a lever to block the ball lift. When the three balls enter the out tray, they push the pin shown above to the right. This pushes the vertical lever which stops any more balls from being lifted into play.
However an unscrupulous player might load an additional ball immediately, allowing another batter even with three outs. The horizontal lever above is attached to two small pins on the top side of the playfield that block balls from passing down the channels and entering the run scoring tray.
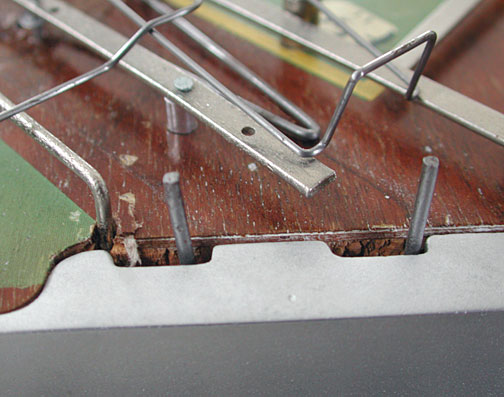
The pins above are blocking the two channels leading to the run tray. The pins are in the end of game position, moved to the right in their slots. Once the game is reset and all the three balls in the out tray are dropped, the springs will cause the levers to move back and the pins will move to the left most position, unblocking the channels.
The pin is retracted into the out tray, in the reset position, and the levers in the reset position.
Ball Hole Guard
During testing, I found the ball lift was working to raise the ball but often the ball would bounce and fall back down the hole. This is partly due to the shallow groove in front of the ball shooter but also because of wear to the hole. The ball is pushed against the playfield and wears the edge of the wood. You can see some of the wear that is now protected by the ball hole guard. This also provides a lip that prevents the lifted ball from falling back down the hole.