High Speed Restoration
June 4, 2001
- Part One
- Introduction
- Project History and Philosophy
- Strategy
- Who, Where, and When
- Stages
- Research and Evaluation
- Dismantling the Old
- Cleaning
- Part Two
- Playfield Restoration
- Playfield Swap
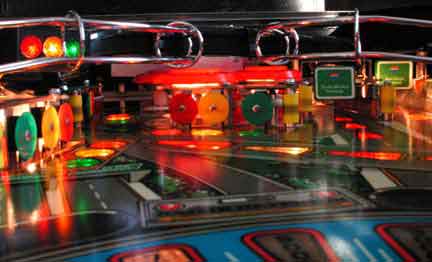
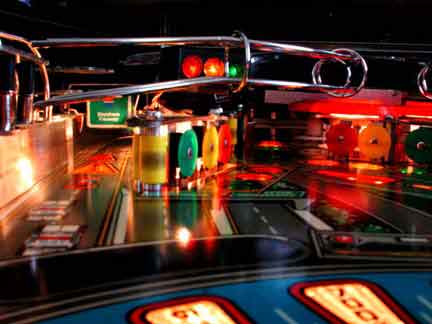
- Top of the Playfield
- Steel Fences
- Plastics
- Ramps, Spinners and Wire Trails
- Part Three
- Bottom of the Playfield
- Wiring and the Cabinet Head
- CPU Swap
- Modifications
- Cabinet
- Assembly
- Game Play
- Summary
Note: Each part takes approximately one minute to download. Comments on the quality and quantity of the images will be gratefully accepted.
Introduction:
I bought High Speed in July of 1988. It was my then girl friend’s, now wife’s, responsibility! We were playing an arcade style video game together and I asked her if she enjoyed video games. She said not particularly but she had grown up with a pinball machine in the house and preferred them to video games.
I decided to get her a pinball for a Christmas present. I bought one and then found an operator going out of business and bought three more, including the High Speed. I never did give her one, and I have been collecting and restoring them ever since!
I did not know much about pinballs at the time. I knew enough to realize the playfield and plastics were worn and broken on the High Speed, so I bought a new blank playfield and ordered new plastics. Meanwhile we played and enjoyed it. After a while it started having problems so I put the game on end and forgot about it.
I found some time and a desire to clean up some things in the house, again with my wife’s blessing. Notice how much support I get from my wife! High Speed made it to the top of the list. This is the story of its restoration.
History
Game History
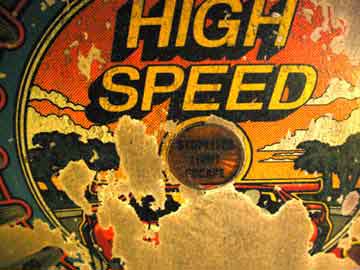
The game was released by Williams in January of 1986. It was so fun it made all the video game players take another look at pinball. High Speed's success was followed closely by that of Pinbot.
Credits
Design and Concept Steve Ritchie
Software LED (Larry Demar)
Sounds Bill Parod
SSR
Eugene Jarvis
Graphic Design Mark Sprenger
An exceptional paper, documenting the rules, was created by Bill Ung and was published on the Pinball Pasture, now gone. Do a search online for a copy.
Project History and Philosophy
I thought about the kind of game I wanted when all the work was completed. I wanted the game to look like it was fairly new but had been on location for a couple of months. I wanted it to look like people had played it and enjoyed it. I was influenced by the fact I had a new playfield and new plastics. The work needed to be balanced. If the plastics are brand new and are placed on a worn game, the difference is immediately apparent. Similarly, a newly repainted cabinet appears as a contradiction with a badly worn playfield.
Now, with almost 15 years experience restoring pinballs, my evaluation of High Speed had changed. It now appeared to be in nice, original condition. The playfield did not have any obvious wear, as it was covered in Mylar. The components under the playfield were in good condition, and all the plastics were there, or so I thought. More on plastics later.
Some of the plastic inserts were raised above the level of the playfield and would cause a problem if not reset to playfield height. The game worked the last time I played it. The CPU board did not show any signs of work, but I remember making some changes to the power supply board. All the displays worked. At first glance this looked to be an easy restoration. I just need to shop the game!
I still had the new-old-stock playfield and a new set of plastics. I suppose I could sell those. I also remembered reading all sorts of daring-do on the Internet, especially in rec.games.pinball, about people removing Mylar, people painting their playfields with polyurethane, which is similar to Diamond Plate. There were numerous stories of people replacing playfields.
A friend recently stopped by and noticed my High Speed. He noticed the holes in the cabinet where an operator installed a hasp across the coin door. He sold me another High Speed with a better cabinet for $50. The condition of the second game was poor. It was missing the backglass, the playfield was worn down to the wood in many places, and various pieces were removed to fix other games.
I wanted to restore my game, as doing so would remove one game from my house, the parts machine, and make my wife even happier! The kids had never seen the game operating and were all for the restoration as well.
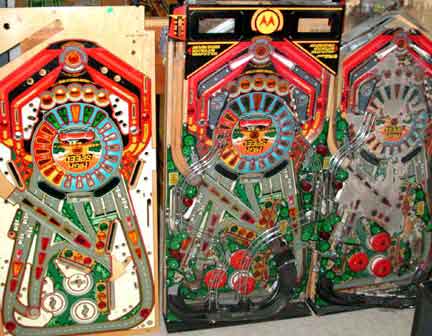
I needed to make some decisions. I have one playfield, worn to the wood, with old, worn out mechanisms. It was dirty. I have another playfield, in very good original condition, and the components were well cared for and almost clean. I also have a new playfield.
I decided to restore the game completely. As I said at the beginning, it should look like it arrived from the factory, was set up by a competent operator and had already provided some lucky players with several hours of enjoyment.
Strategy
I made a plan before starting.
My plan was to:
- put the wiring from my clean game on the bottom of the new playfield
- replace the old plastics with my new-old-stock plastics
- use the bottom cabinet from the second machine
- refinish the coin door from my machine and put it on the cabinet
- take the internals from my back box and place them in the second machine's backbox.
- select the best miscellaneous parts, legs, backglass, emergency light, ramps, and other parts and place them on the new machine.
I was going to take the new playfield and plastics, the best parts from my good game, and the cabinet from the bad game. This was going to pose some unanticipated challenges later.
I decided to determine the fate of the remaining parts after I finished the restoration. I hoped to resurrect a second machine if possible, although it would be a real project. For example, it would be easier to use the dirty playfield as a donor for parts, leaving me with one good playfield with good parts on both sides.
Who, Where, and When
The restoration was done at The Sands Mechanical Museum in Sunnyvale, California, and was finished in June of 2001. It was performed by Michael, Dustin and Ryan Sands
Stages
- Philosophy
- Evaluation
- Disassembly
- Cleaning
- Fixing
- Assembly
- Punch list
- Test
- Enjoy
Research and Evaluation
On older games, I look for patent numbers. There is a patent office near by and the research is invaluable. Often the designers will supply schematics, rules of play, and their intentions for the game. In this case the game is from the modern era and I did not expect to find much.
The new-old-stock (NOS) playfield was examined. It was "punched". This means the spots for screws on the bottom side were marked with nail marks, making it much easier to install new components. The paint registration marks, indicating where the different color screens were located, were close, suggesting the playfield was not a reject.
I decided to coat the playfield with varathane and I used the new Flecto Varathane Elite Diamond Finish. This is water based, dries as a thin, clear, hard finish. It should be applied in a series of thin coats with plenty of time to dry between applications. I let each coat dry completely and sanded with 600 grit between coats. I put on six coats and finished with a heavy final coat. This was cured for two months. (See also Clay's exceptional documentation on clear coating playfields.)
The plastic set was still in the original bag, so I figured it was complete. I was pleasantly surprised to find a helicopter and the arch in the package.
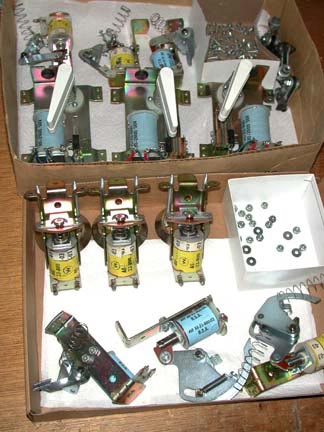
I needed to remove all the components out of the parts cabinet and clean it. I decided to use the parts machine head, but I lacked the components, including the radio frequency interference shield, out of my original game. There were a couple of surprises waiting for me.
I did an inventory and ordered replacement parts from the Steve Young at The Pinball Resource.
I took pictures. I took hundreds of pictures! I took pictures from every angle, with different kinds of lighting. I took them of every conceivable object. I still did not take enough! I wanted to take enough pictures to answer any question that might come up, about where something was located or how two things went together. I used a digital camera. Digital film is inexpensive. I still missed some things!
Finally I went to the Internet and reviewed my notes. Clay has the most amazing web site that describes how to restore your pinball machine, see reference below. Jonathan Deitch was a pinball technician and provided many of us with invaluable information on maintaining pinballs for many years. Tim Arnold is an inspiration. My friends helped. A whole community provides invaluable information. My notes were full of good information, saved for this very moment.
There are constant warnings about doing a playfield swap. Let me add mine. This is not an effort for the disorganized or faint-of-heart. It is not for those with busy schedules. I figured I was smart and could finish it quickly if I concentrated. I will add to the warnings with this: you will finish all the stuff you think is required quickly. It is the hidden stuff, the unforeseen stuff that will take you hours and hours. Read on.
Dismantling the Old
I started by taking everything off the top of the best playfield. Of the two I have, this was the most original pinball, having come off the street in 1988, two and a half years after it was made. I divide the playfield into six segments: top, middle, and bottom with left and right sides. I take all the stuff off one segment and put it in a tray. I took more pictures as things were removed and placed out of the way.
By segmenting the field, you know the general area where the part must go when putting things back together. My oldest son helped. Taking things apart is a great opportunity to teach children how to use tools and let them get involved in what you are doing. The time my kids helped became my favorite time during the restoration
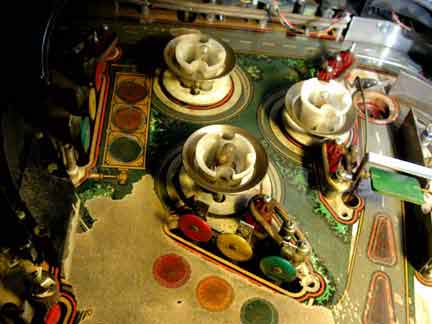
When I finished with the top of the playfield, there was nothing left! I even removed the anti-bang-back rails, the wires that are just behind the flipper, at playfield level. I took off the wood rails and the wood back panel that holds the ramps. The field was flat. Dirty, but flat!
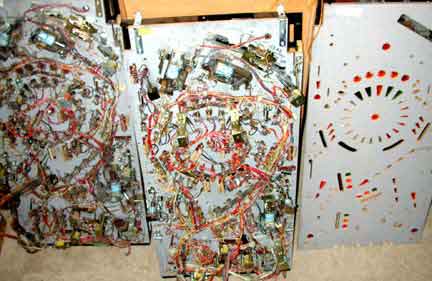
I flipped the play field over. It seems like I needed to start all over again, removing things!
All the components needed to be removed from the bottom. I started by making a special tool. I took a socket driver, a screwdriver handle with a socket, and cut off the handle. I put the cut portion into a reversing electric drill, providing me with a power nut driver. I removed every screw I could find from the bottom of the playfield! It only took 15 minutes and I still missed a bunch!
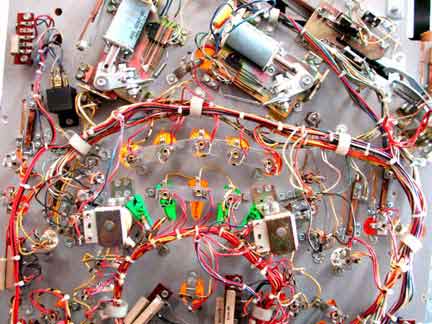
I un soldered all the coils and mechanisms. A trick is to cut the wire leading to a device, and leave a small portion of the wire color on the terminal. Later, when you reinstall the electrical device, you can see which wires go where because of the small color coding you left during disassembly. Again, I put everything I took off into a tray, marked with the geographic area of its origin. Trays full of dirty parts were now littering the workshop!
Progress here is difficult to evaluate. No matter how many screws I removed and how many mechanisms I removed, there was still a mass of wiring left. All the mechanisms were in trays but the wiring hid much of what was left. My goal was to remove everything but the wires. The wires would be moved last.
Cleaning
I think restoration is 20% knowledge and 80% cleaning. I spend most of my time at the sink, washing, cleaning, and cleaning some more. All things removed were cleaned. I use cleanser on metal, dish soap on plastics, and an ultrasonic cleaner on mechanical parts. I spend hours at the buffing wheel and with a wire brush, re turing a shine to dull parts. I used Lightening Strip to remove rust from parts. Elbow grease is the most important thing for making a great game, both how it plays and how it looks. The workshop was now littered with trays of clean parts.