Official Baseball: The Restoration: Cleaning

Cleaning the Coin Slide
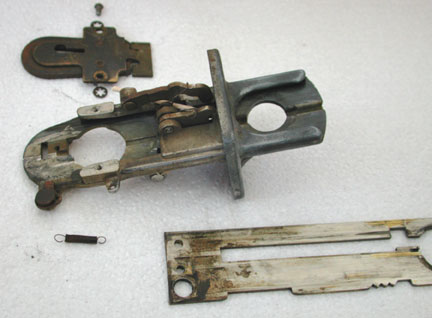
I disassembled and displayed the parts for the coin slide. The slide itself was not originally for this game and was poorly installed in the door. I will have to fabricate some new bolts that are the correct length. The stop on the coin slide was missing so the player could pull it almost all the way out. I will have to fabricate a new stop but I need to see what the coin slide pushes against before doing so.
The fingers that sense the coin and prevent the slide from resetting the game are riveted to their pivots. It is possible to disassemble the pivots by drilling out the rivets but this is not original. Instead, I put the assembly in the ultrasonic cleaner to get the dirt and caked lubricants out of the pivots.
I rinse and dry the assembly. I mask off the front side to protect it and bead blast the back side. I wash it again to get all the beads out of the screw threads and pivots. That is wash number two.
Finally I polish the front side and the coin slide itself on the buffing wheel. I need to be careful not to go through the thin layer of plating. The plating was thin because the game manufacturer did not expect it to be on location for very long and were trying to keep the manufacturing costs to a minimum. In this case the plating was already worn down to the brass on the push portion of the slide, probably because of the wear from play and the cleaning on location. As I always say, human sweat and oil are one of the most corrosive substances in the world! The buffed parts are washed for a third time to remove any of the buffing compound.
Notice the extreme measures to keep the parts clean. Glass beads, cleanser, steel wood, and buffing compound are all abrasives and will accelerate wear if they are not removed completely. I make absolutely certain to remove all traces of these materials by multiple washings and air blast drying. The air blast drying or heat drying is helpful in preventing further corrosion while the parts are still wet.

Worn Spring Tab
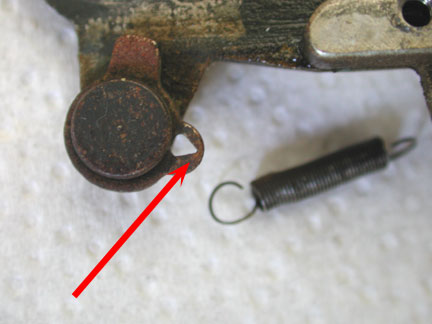
Note the worn hole where the ratchet spring mounts on the coin slide assembly. It used to be round! Many people do not think to lubricate the portion where the spring mounts to an assembly. The spring moves just like any other part and will rub against its mount. It needs lubrication just like any other sliding surface. Often the spring wire itself will be worn thin or if it has broken previously, a new loop will be created as a repair. This tab is not worn badly enough to require repair, especially if it is lubricated after assembly. If I did need to repair the tab, I will cut a U to cross the gap and then will silver solder the loop to the tab. A small steel washer will close the hole but usually they are too thin. I use piano wire to form the U and Tix to solder the U to the spring tab.

Cleaning the Shooter
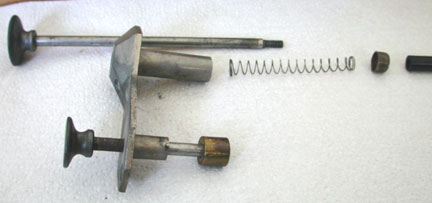
The shooter is disassembled. Notice the ball lift cannot be disassembled because the brass end is corroded on. I tried a grips with rubber pads on the teeth and some heat, in an attempt to unscrew the brass lift end but was not successful. It is possible to heat it more and use force but this will often distort and scratch the soft brass or cause other parts to distort. Some judgement is required to decide when enough is enough. I will use the ultrasonic cleaner again to clean areas that are not accessible.
The assembly is immersed in the ultrasonic cleaner to get the hardened lubrication and dirt out of the ball lift rod and bushing. The knobs and push rod are badly corroded. I polish them all with a buffing wheel. I avoid bead blasting on any sliding surfaces because the beads leave a texture. The original surfaces have worn into each other and generally are very well matched after all these years of rubbing against each other. If there are bad scratches or the surfaces do not mate well, then I will buff out the wear pattern. If I must bead blast A part that has a bearing or sliding surface, I mask off the area before blasting.
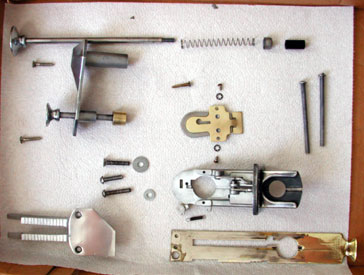
The front of the shooter bezel is polished and the assembly receives a final wash and dry. Everything is clean and ready to be assembled.

