

Disassembly of Official Baseball (Genco, 1934)
Disassembling the game was easy. The long wood screws around the outside of the playfield were removed and the playfield surround lifted out. The shooter and bezel need to be removed by removing the two screws. The playfield can now be lifted out.
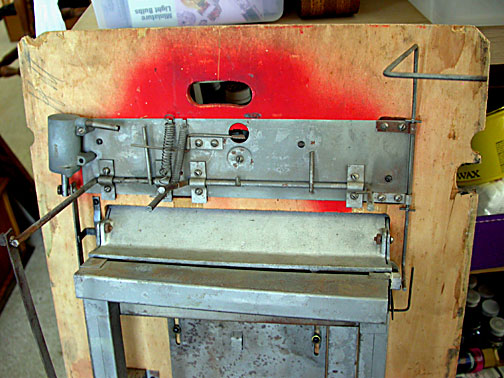
Bottom of the Playfield
The bottom of the playfield shows the normal amount of surface corrosion and surface rust. The pneumatic damper at the upper left is frozen solid, preventing the game from being reset. All these parts will be removed, cleaned or bead blasted, and reassembled. Note the initials at the upper left.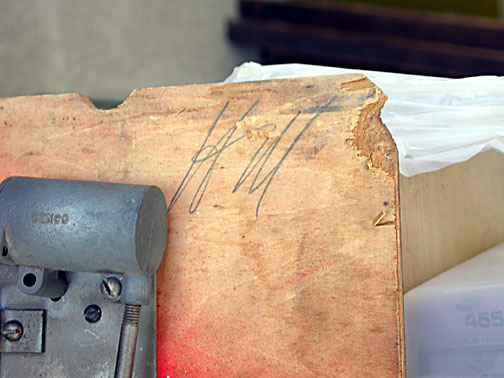
I love finding information like this. Sometimes the initials or other penciled information found inside the cabinet might indicate a famous person participated in the construction or inspection of a game. In this case the "H.M."does not appear to match any of the names associated with Genco or the designer of the game.
Old clocks and pocket watches have many initials scratched in their cases or into the plates of the clock or watch. These indicate a service person and date. I doubt arcade games got the same attention. I do not add my initials once I have restored a game as I do not want the game to be altered. I do take time to note some special characteristic of a game so that I can identify it later as having been restored at the Museum.
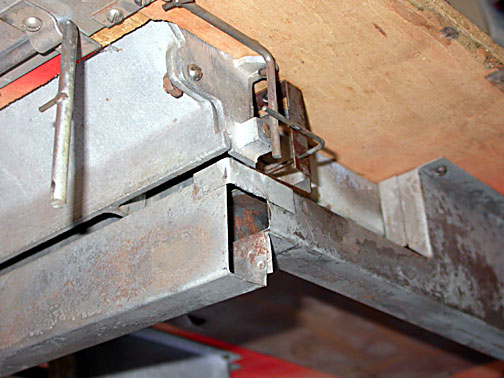
This is another view of the ball feed located on the bottom of the playfield. I take many pictures, often many of the same parts but different angles, in order to aid the disassembly and more importantly, the assembly of the game. See also below.
Base of Cabinet, Ball Return
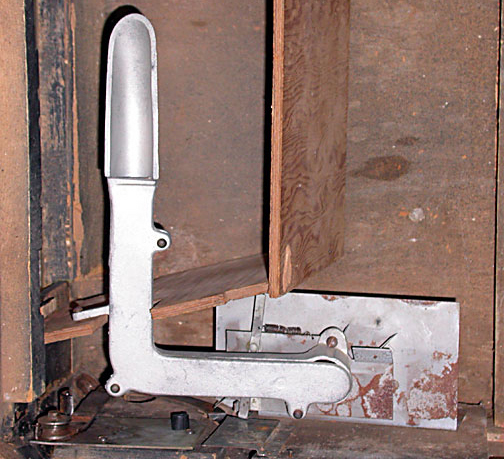
The ball return located in the front of the cabinet shows the common use of both metal castings and sheet metal. Both show the surface corrosion and rust. This is the first picture of a series of pictures that I take as I disassemble components out of the game. I will try and keep the major assemblies like those shown here, together for later sub-assembly cleaning.
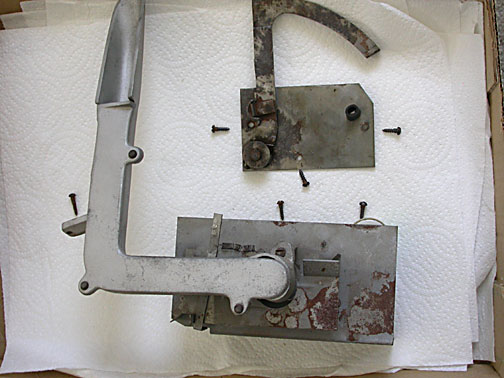
Here are those same parts removed. Notice how they are arranged in the box pointing in the same direction and relative to each other. I generally take one part out, arrange it in the box and take a picture. I arrange the nuts, bolts, and screws pointing towards the hole where they were originally. I can even enlarge these pictures and see how many threads or exactly how long any part is so as to put them back exactly where they were originally. Note how the screws point towards the holes where they were located inside the cabinet.
Then I take out the next assembly and place it relative to the previous parts. This sequence of pictures will show the assembly order when reversed and helps avoid the problems of what goes back first. (The above is a poor example as the ball lift is not arranged in the proper location to indicate where it will go back. I noted the difference in my notes.)
Later, when cleaning the above parts, I will take more disassembly sequences of the sub-assemblies.
Cabinet
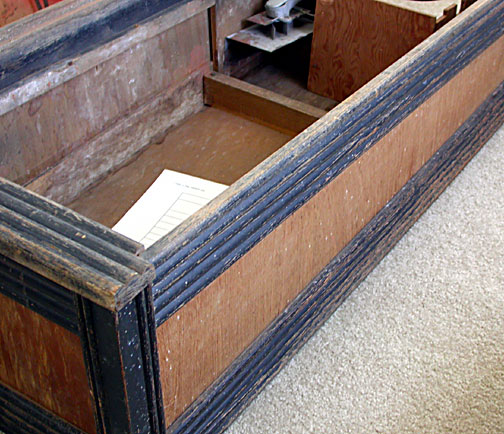
Now that the cabinet is empty of parts, I evaluate what is needed to repair and refinish it. I try to avoid refinishing any game unless the condition is very poor. I always discuss the refinishing with the client before proceeding. I like to remind them about scenes on the Antique Roadshow when the appraiser tells the poor owner that the cabinet is worth $5000 now that it has that nice new finish. It would be worth $50,000 if they had left on the original, and flawed, finish!

I deliberately increased the contrast of this photo, trying to show the condition of the black finish. It appears the game was submerged in water or got very wet. This raised the grain and the black finish flaked off. Notice the black area that was under the shooter. It is very black, smooth, and glossy. I will show these pictures to the owner of the game and recommend the game be refinished. Unfortunately the current condition looks damaged and does not have any patina left.
The sides of the cabinet have some damage. It looks like some white paint was spattered but upon close examination, I think it is white mold. The spots are actually eaten into the finish. I removed these with a small dental pick and some alcohol. There is no finish left on the natural wood insets and the veneer was raised in some small spots.
There are some dark smudges on the wood finish that were removed. The center insert was not masked well during manufacturing and so there is some black over spray around the edges. I will leave these because the overspray was on the game when it was made originally.
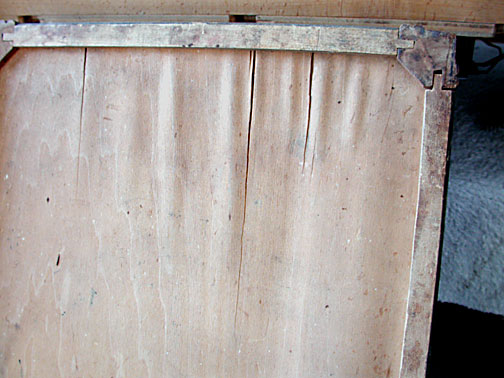
This shows some additional separation and lifting on the bottom front of the cabinet. Only a thin layer has lifted so it is still structurally sound. I will inject some white glue under the surface and weight it down. It will not be smooth but it will not deteriorate further.
When I restore a game, I try and save the fun parts for last. I will go ahead and refinish the cabinet and legs. Then I will cleans, assemble, and install the ball feed, ball return, and shooter. Finally I will get to work on the playfield.