
Funhouse, Rebuilding Rudy
The Funhouse pinball was designed and built by Williams Electronic Games in 1990. The theme was a fun house and included a manikin head named Rudy. Rudy was capable of opening and closing his mouth. He could open his eyes wide, normally, and turn the eyes left and right. His mouth has an electric motor to open and close and the eyes are controlled by solenoids. Unfortunately the solenoids are powerful and cause advanced wear and tear in the mechanism.
Here are the steps I used to restore Rudy.
Cracks in the Frame
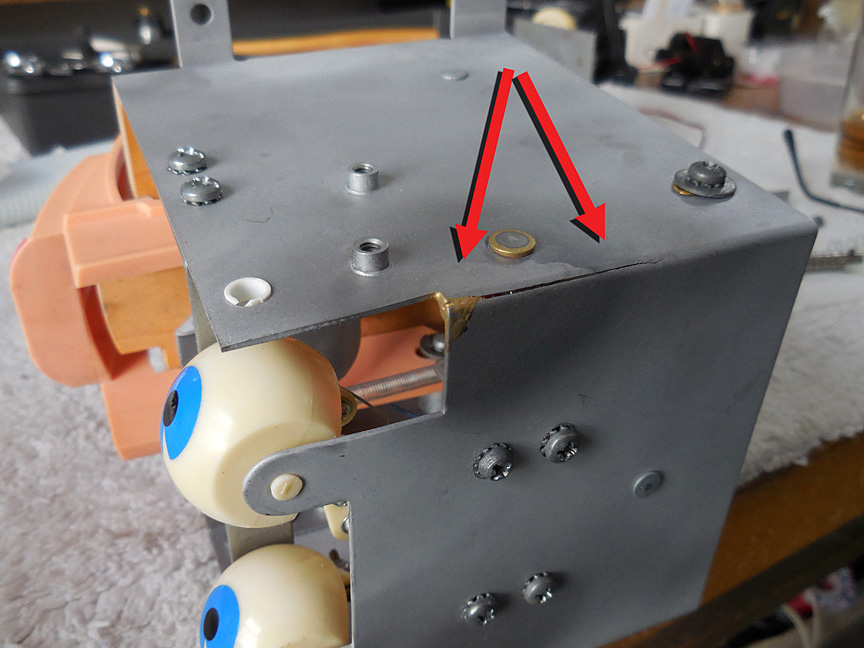
The frame for Rudy is made out of bent metal. The bends were too sharp for the quality of metal and so there are fatigue cracks along the bend. I brazed the cracks. The metal is thin and so MIG welding will burn through if you are not skilled. TIG welding is an alternative. I brazed, which is similar to soldering but with stronger filler.
Link Wear
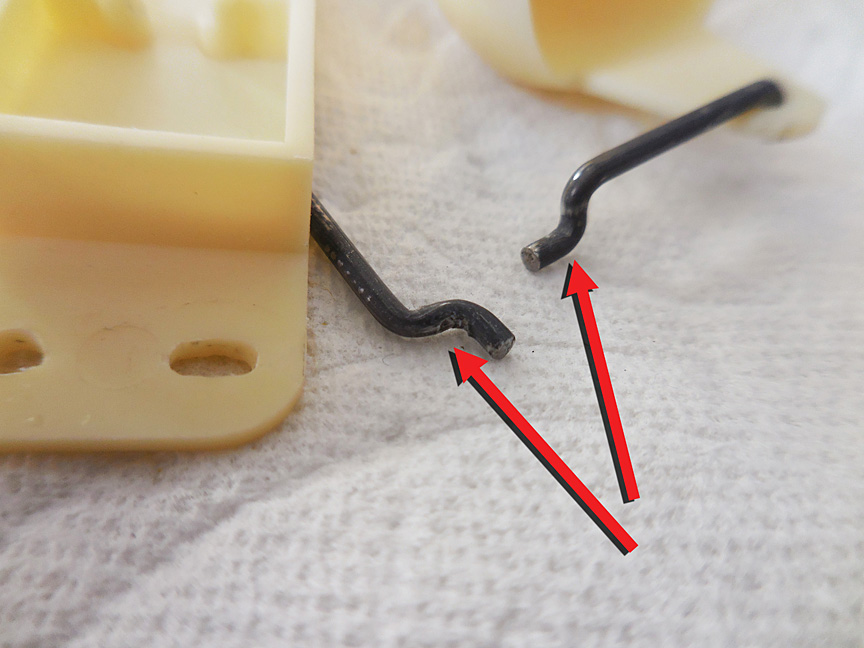
The eyes moving left and right are activated by links formed from bent metal. Unfortunately the bending jig left burrs, raised and sharp ridges on the links. These will wear the holes wider and even wear the tops of the plastic of the eyes and activating bar.
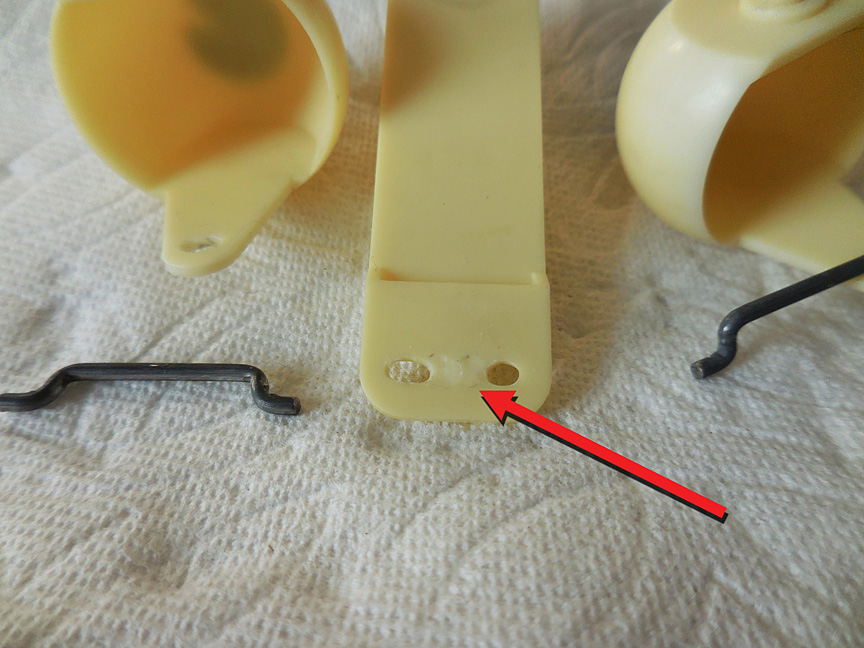
The holes are elongated and the wear is starting to wear through at the top.
Metal on metal wear is preferable to metal on plastic. Metal always wins. So the first modification is to put small #2 bolts and nuts through all the holes. These are tightened and are not supposed to move. No further wear will happen to the plastic pieces. Next I needed to form a new link between the actuator and the eyeballs. The thin piano wire is looped around the bolts and is bent in the middle. The bend acts as a spring, absorbing some of the shock as the solenoid snaps left and right.

The wire can be bent easily by making a jig. Here a piece of wood with some nails provides a way of bending the wire. You may have to touch up the bends with a hammer to make the loops flat and needle nose pliers to complete the loops.
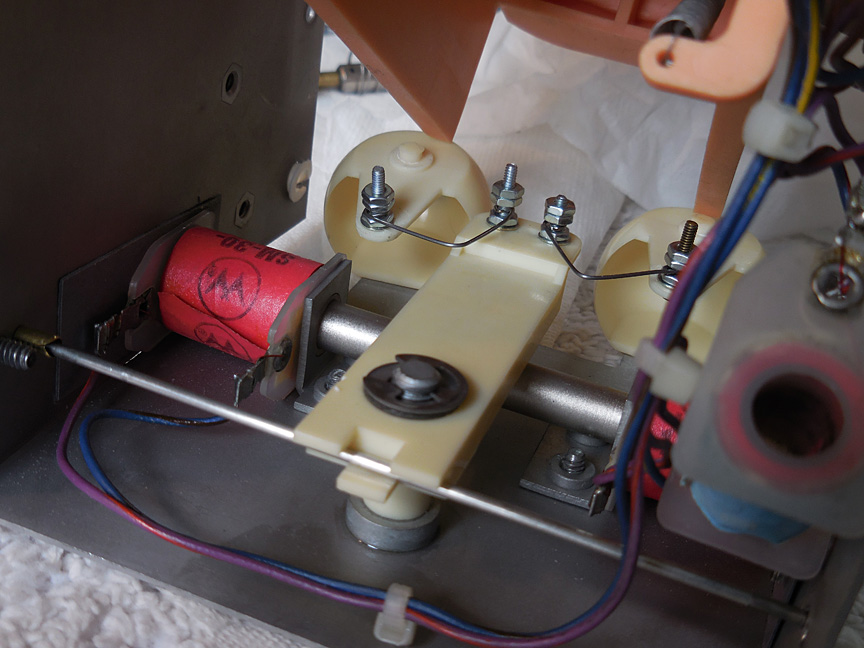
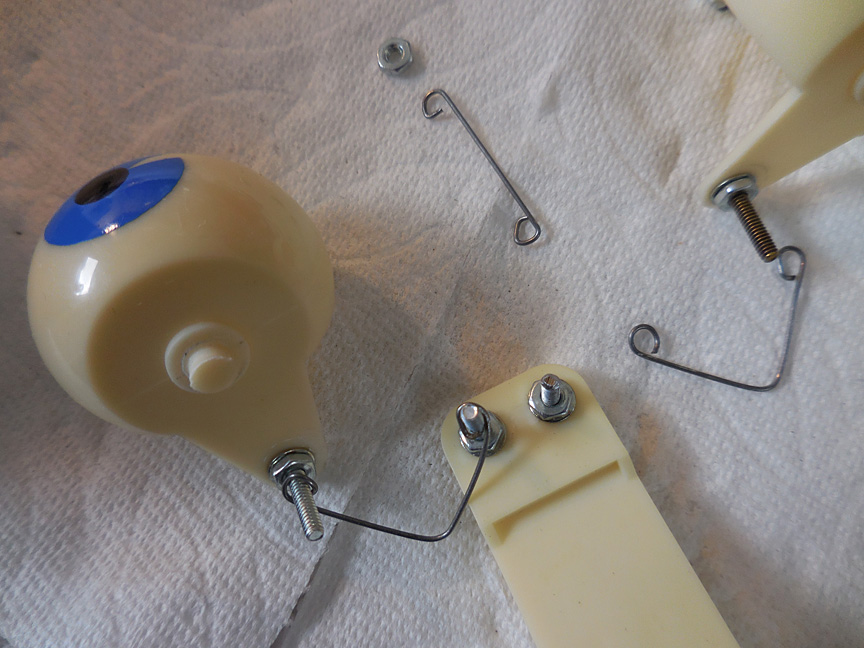
Here the links are installed by attaching them to the eyeballs and actuator. A bit of Locktite will help insure the nuts stay in place.
Upgraded Links and a Centering Flange
There are some upgraded links, part numbers 5 (A-14028) and 7 (A-14030) which have been upgraded to take the stress. Finally there is a piece that was lost on my game, a centering flange, part 19 (03-8486) that holds the coil 11 centered on the bracket 2.
When assembled correctly, all solenoids should operate smoothly with no binding or holding.
Here is a video showing how the internals work in Rudy's head. I deliberately had one eye turned in slightly, thinking it helped him appear demented. The turn in could easy be adjusted by unbending the link on the eye that is wandering.